Set-up MFA for Microsoft 365 Email (Computer Required)
This is a guide to log into your E-Mail and set up MFA (multi-factor authentication). You need to have the app installed on your phone prior to this process. There is another article guiding you through the install of the Microsoft Authenticator application.
It should be noted that this process is only for the activation of multi-factor authentication.
Microsoft 365 applications are unsupported on personal devices currently.
We are currently testing a process in beta that will allow this to work, however, it requires a license which carries a monthly fee of $3.40. For more information regarding this, please have your coach reach out to hbb.support@ymcahbb.ca
Please utilize the following guide for install instructions prior to this guide,
Once the Microsoft Authenticator app has been installed, please do the following from a computer/laptop that has access to the internet.
Step 1: Go to a desktop/laptop computer and sign into Microsoft 365 using Google Chrome or Microsoft Edge.
Step 2: Enter your YMCAHBB.CA email credentials given to you (@ymcahbb.ca email and password). Click next.
Step 3: You will be prompted a screen that will display "More information required".
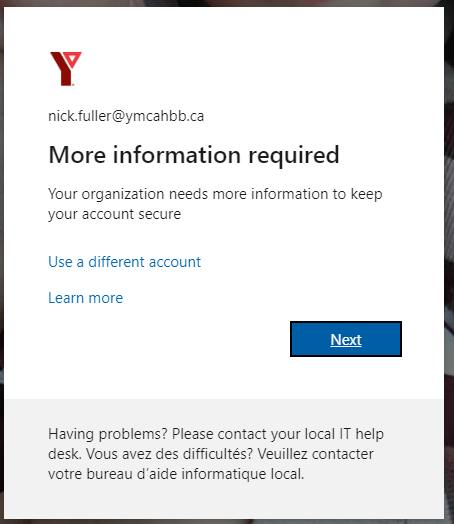
Click next.
Step 4: You will then be prompted to install the app. You should have the app installed on your phone already. There is another article on the installation of the Microsoft Authenticator app.
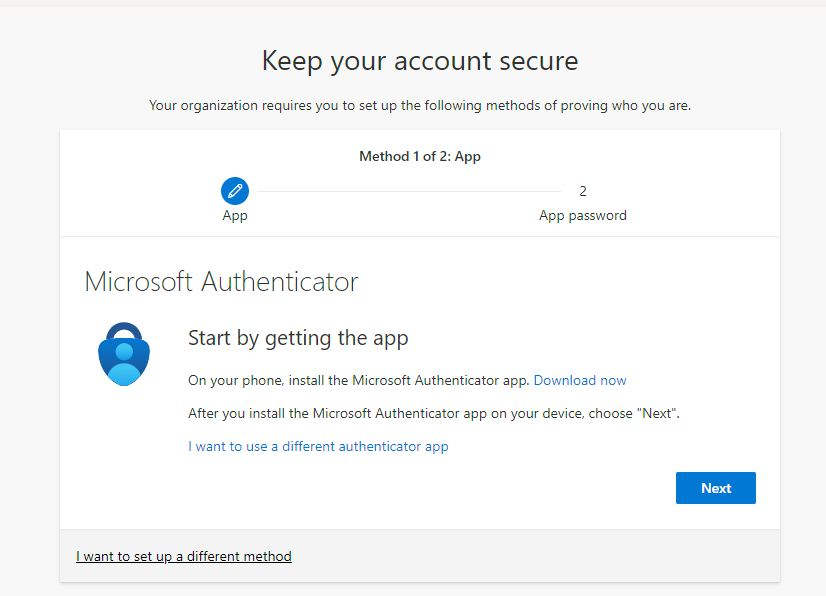
Click next.
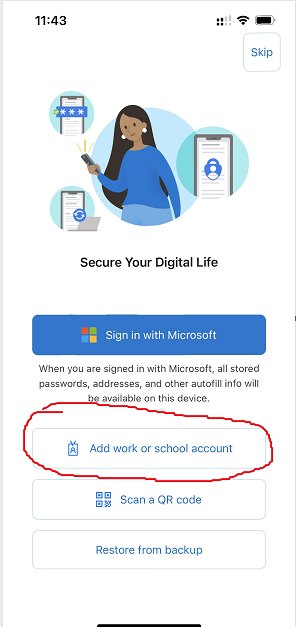
Step 5: Now you want to open your phone and go to the app (leave the browser open on your computer). Once in the app, tap "Add work or school account"
Step 6: On the next prompt, tap the option "Scan QR code"
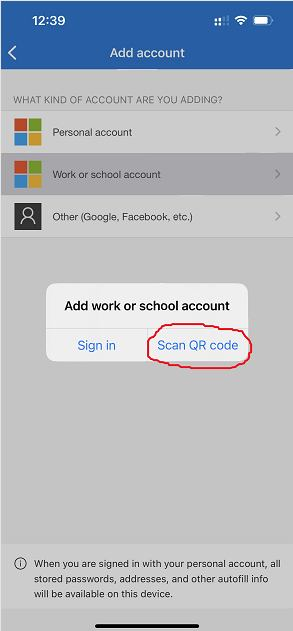
*Note: It may ask "Do you have a backup? if you add an account, you will no longer be able to recover from backup", select "No".
Step 7: On the next prompt, tap "OK" to allow access to your phone camera.
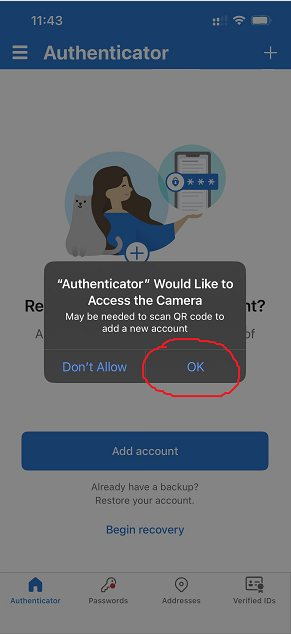
*Note: Your camera should be on now. Leave it on and be ready to scan the upcoming QR code*
Step 8: Go back to your computer. On your computer, you should be on this step.
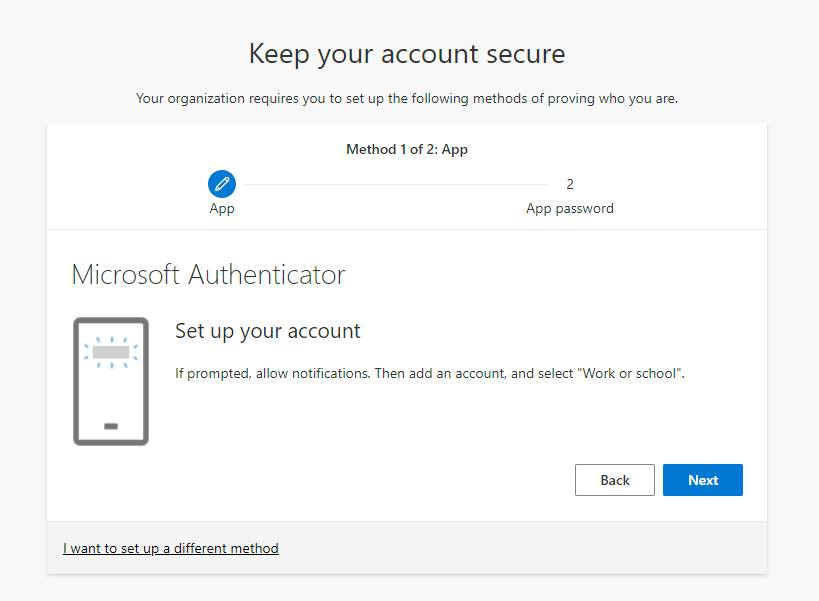
Click next.
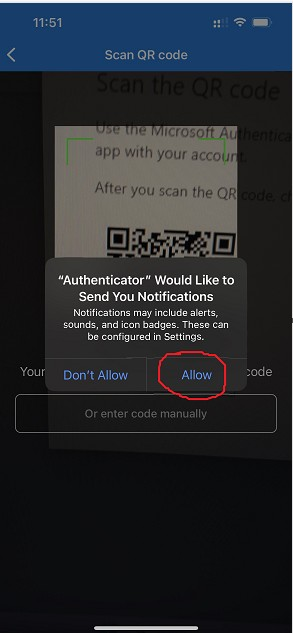
Step 9: You will be prompted with a screen showing a QR code. Go back to your phone and scan that QR code with the camera opened from step 7.

Step 10: Your phone should give you this message to send you notifications. Tap "Allow".
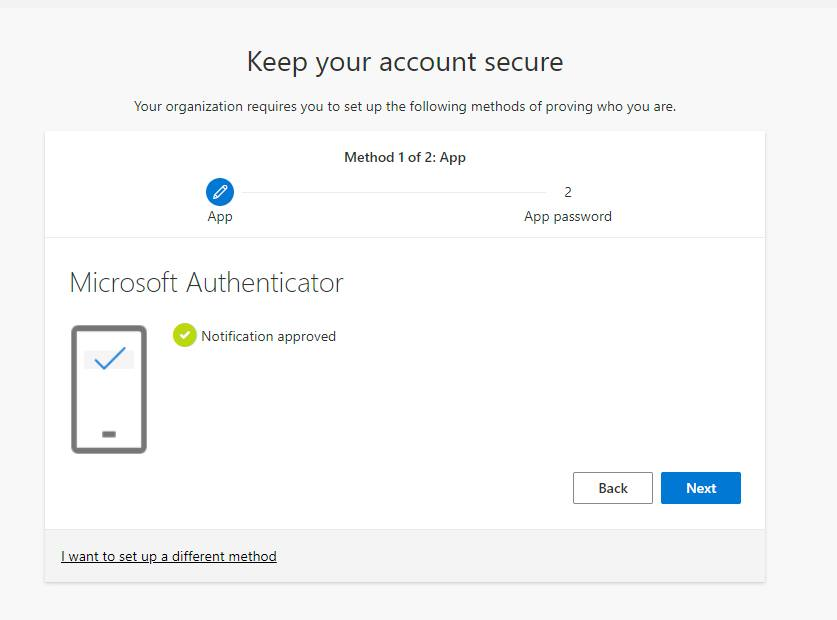
Step 11: Go back to your computer with the QR code up. Click next. You will then be prompted to try it out.
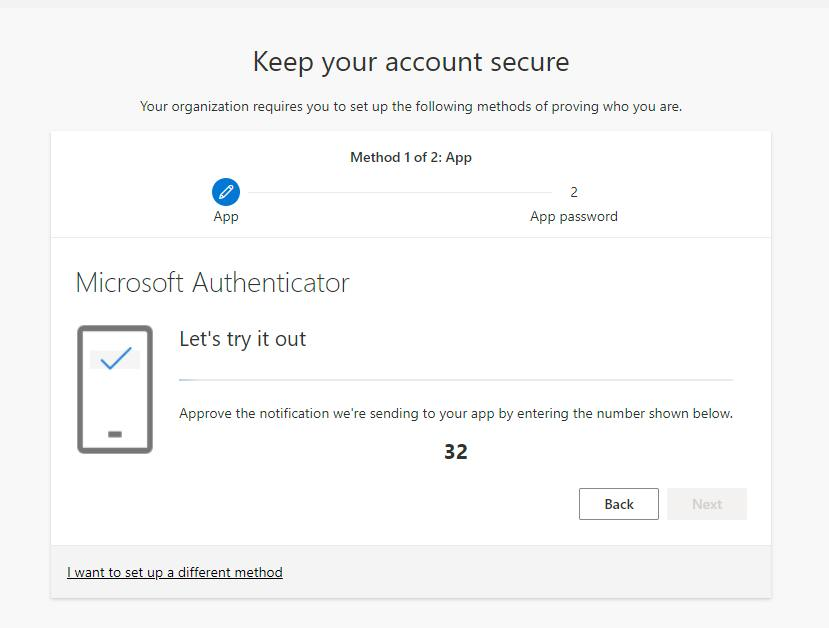
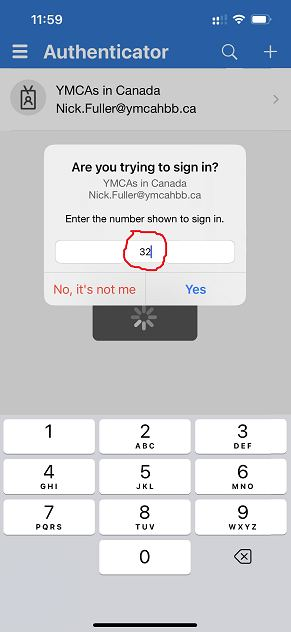
Step 12: On your phone. You will get a notification and prompt to enter the number displayed for you. In this case, the number is 32. Enter that number into that prompt on your phone and tap yes.
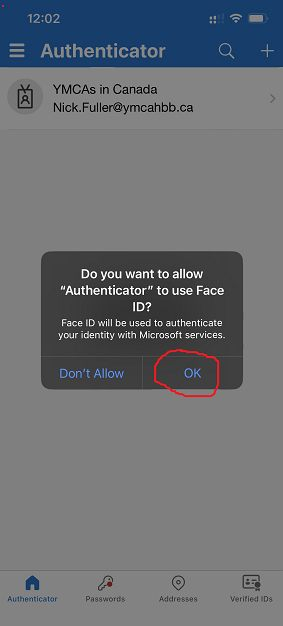
Step 13: If you have face ID or fingerprint scan enabled to unlock your phone. You will be prompted to use that as a way to authenticate your identity. Tap "OK"
Step 14: Go back to your computer. This should now be displayed.