
Reset a YMCA managed iPad
Step 1 - Click the Settings icon on your iPad
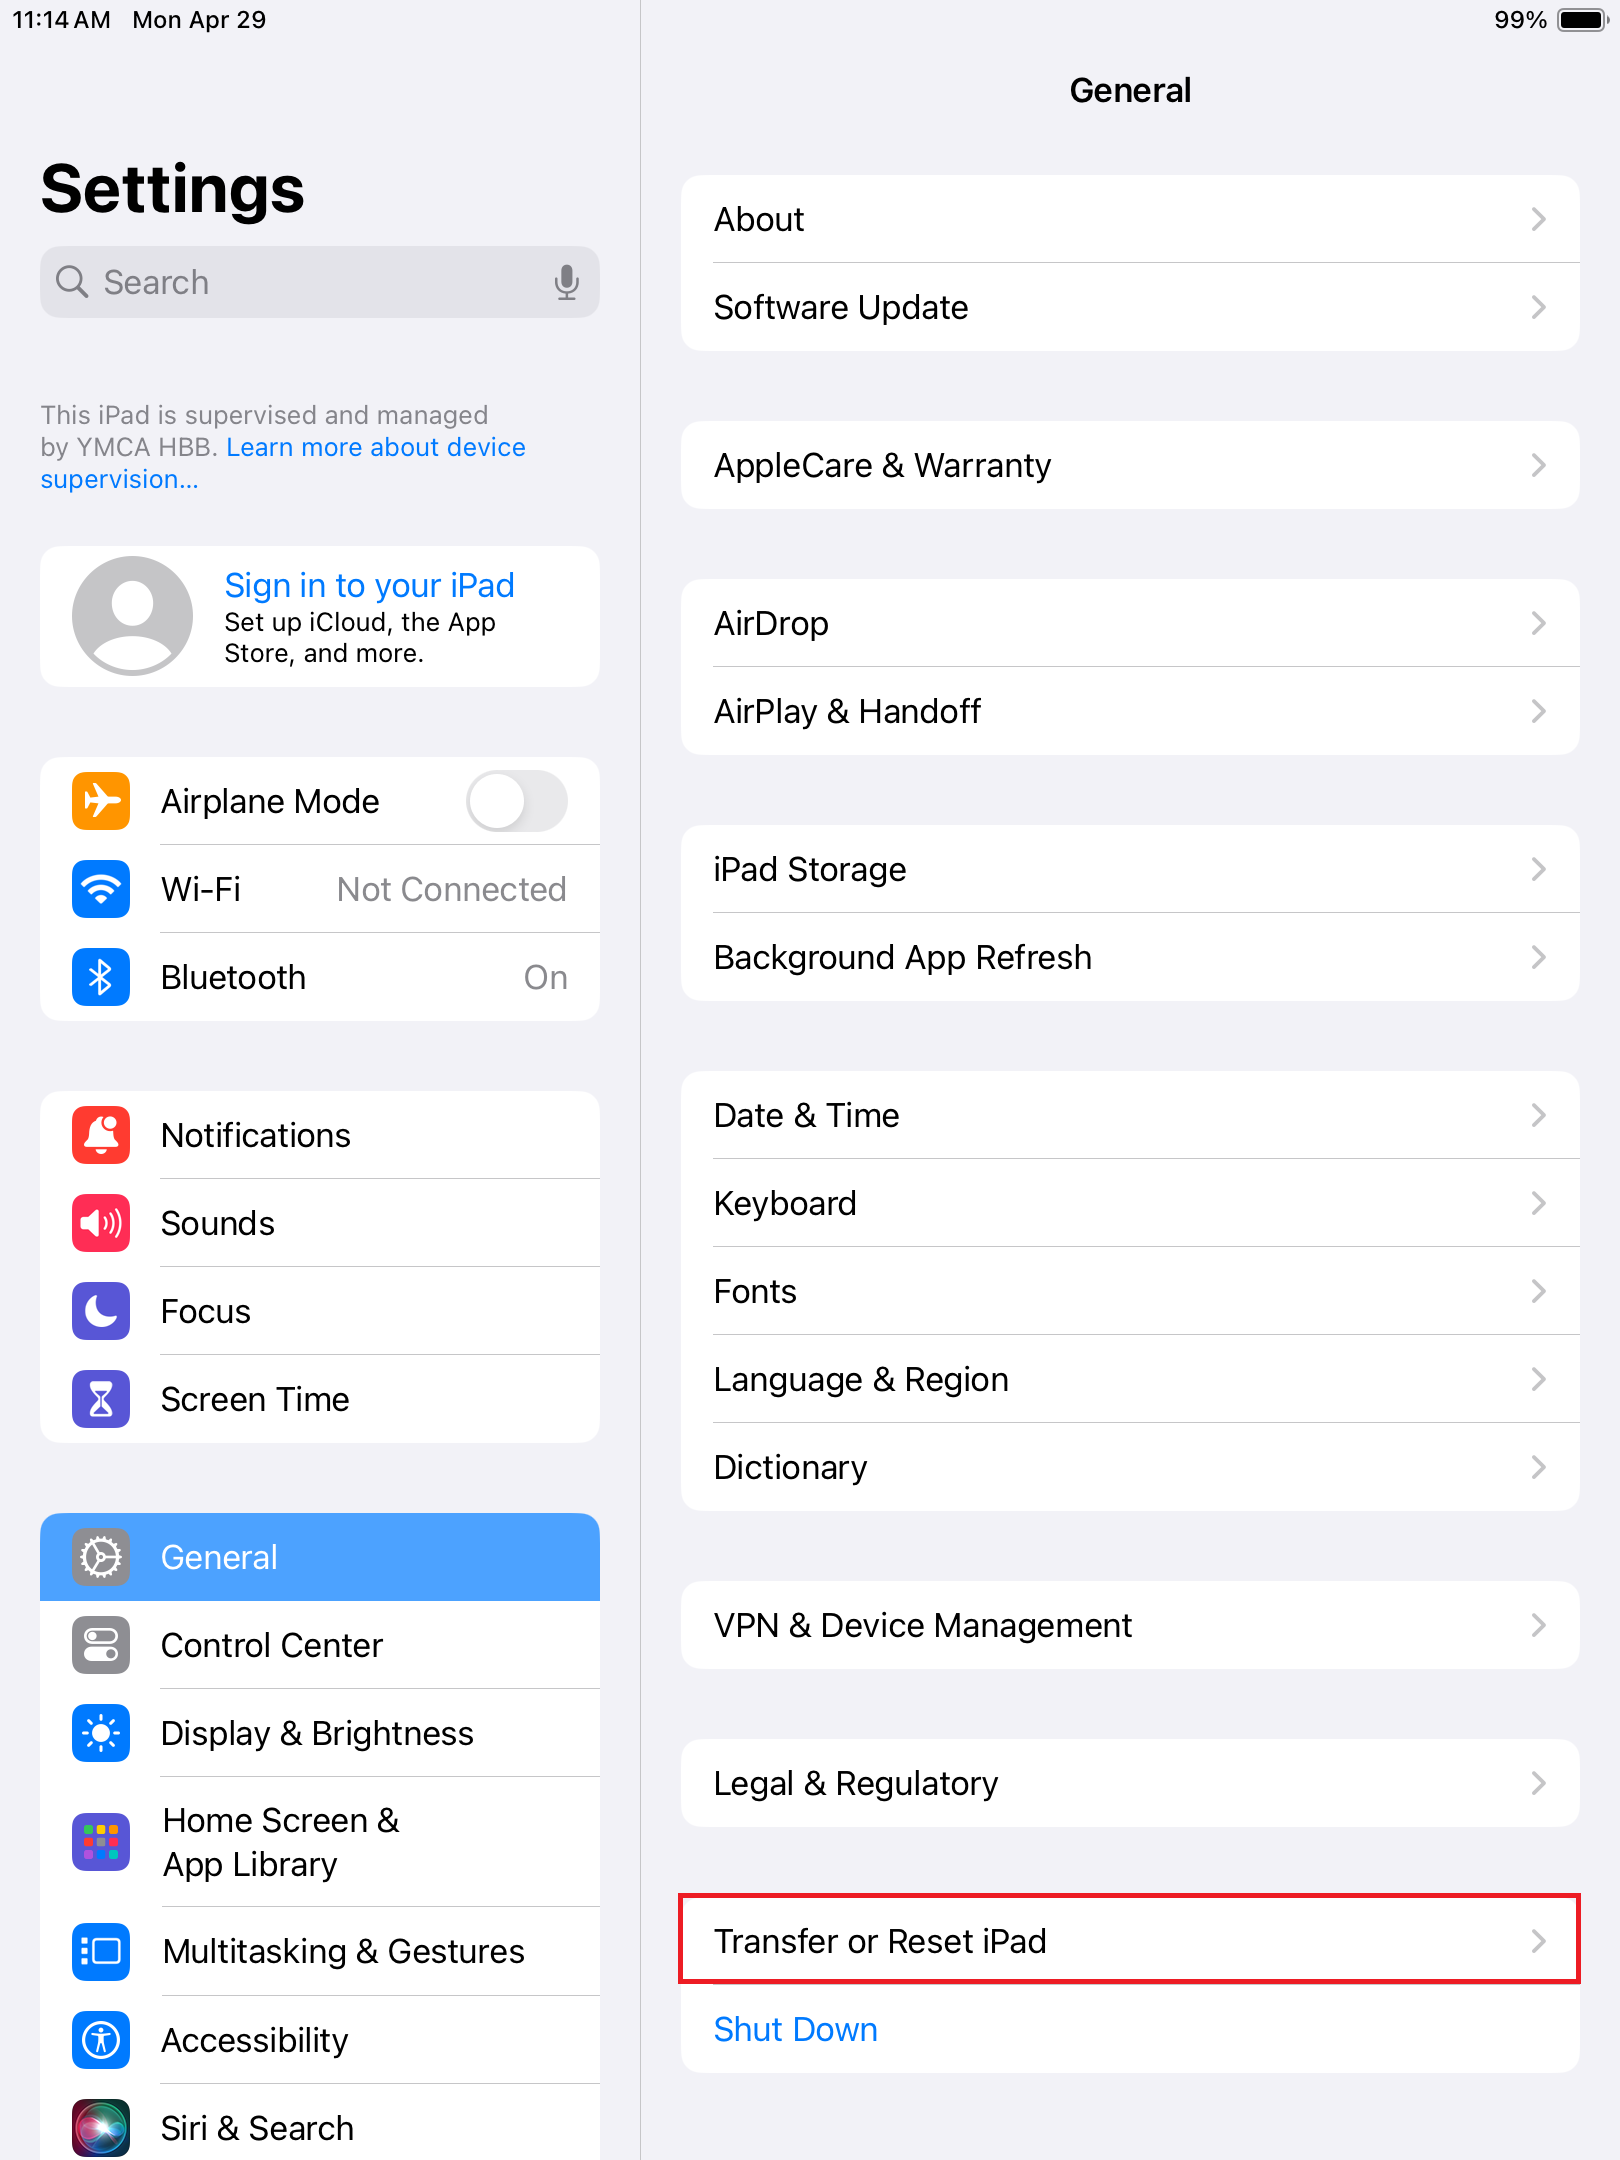
Step 2 - Click the General tab
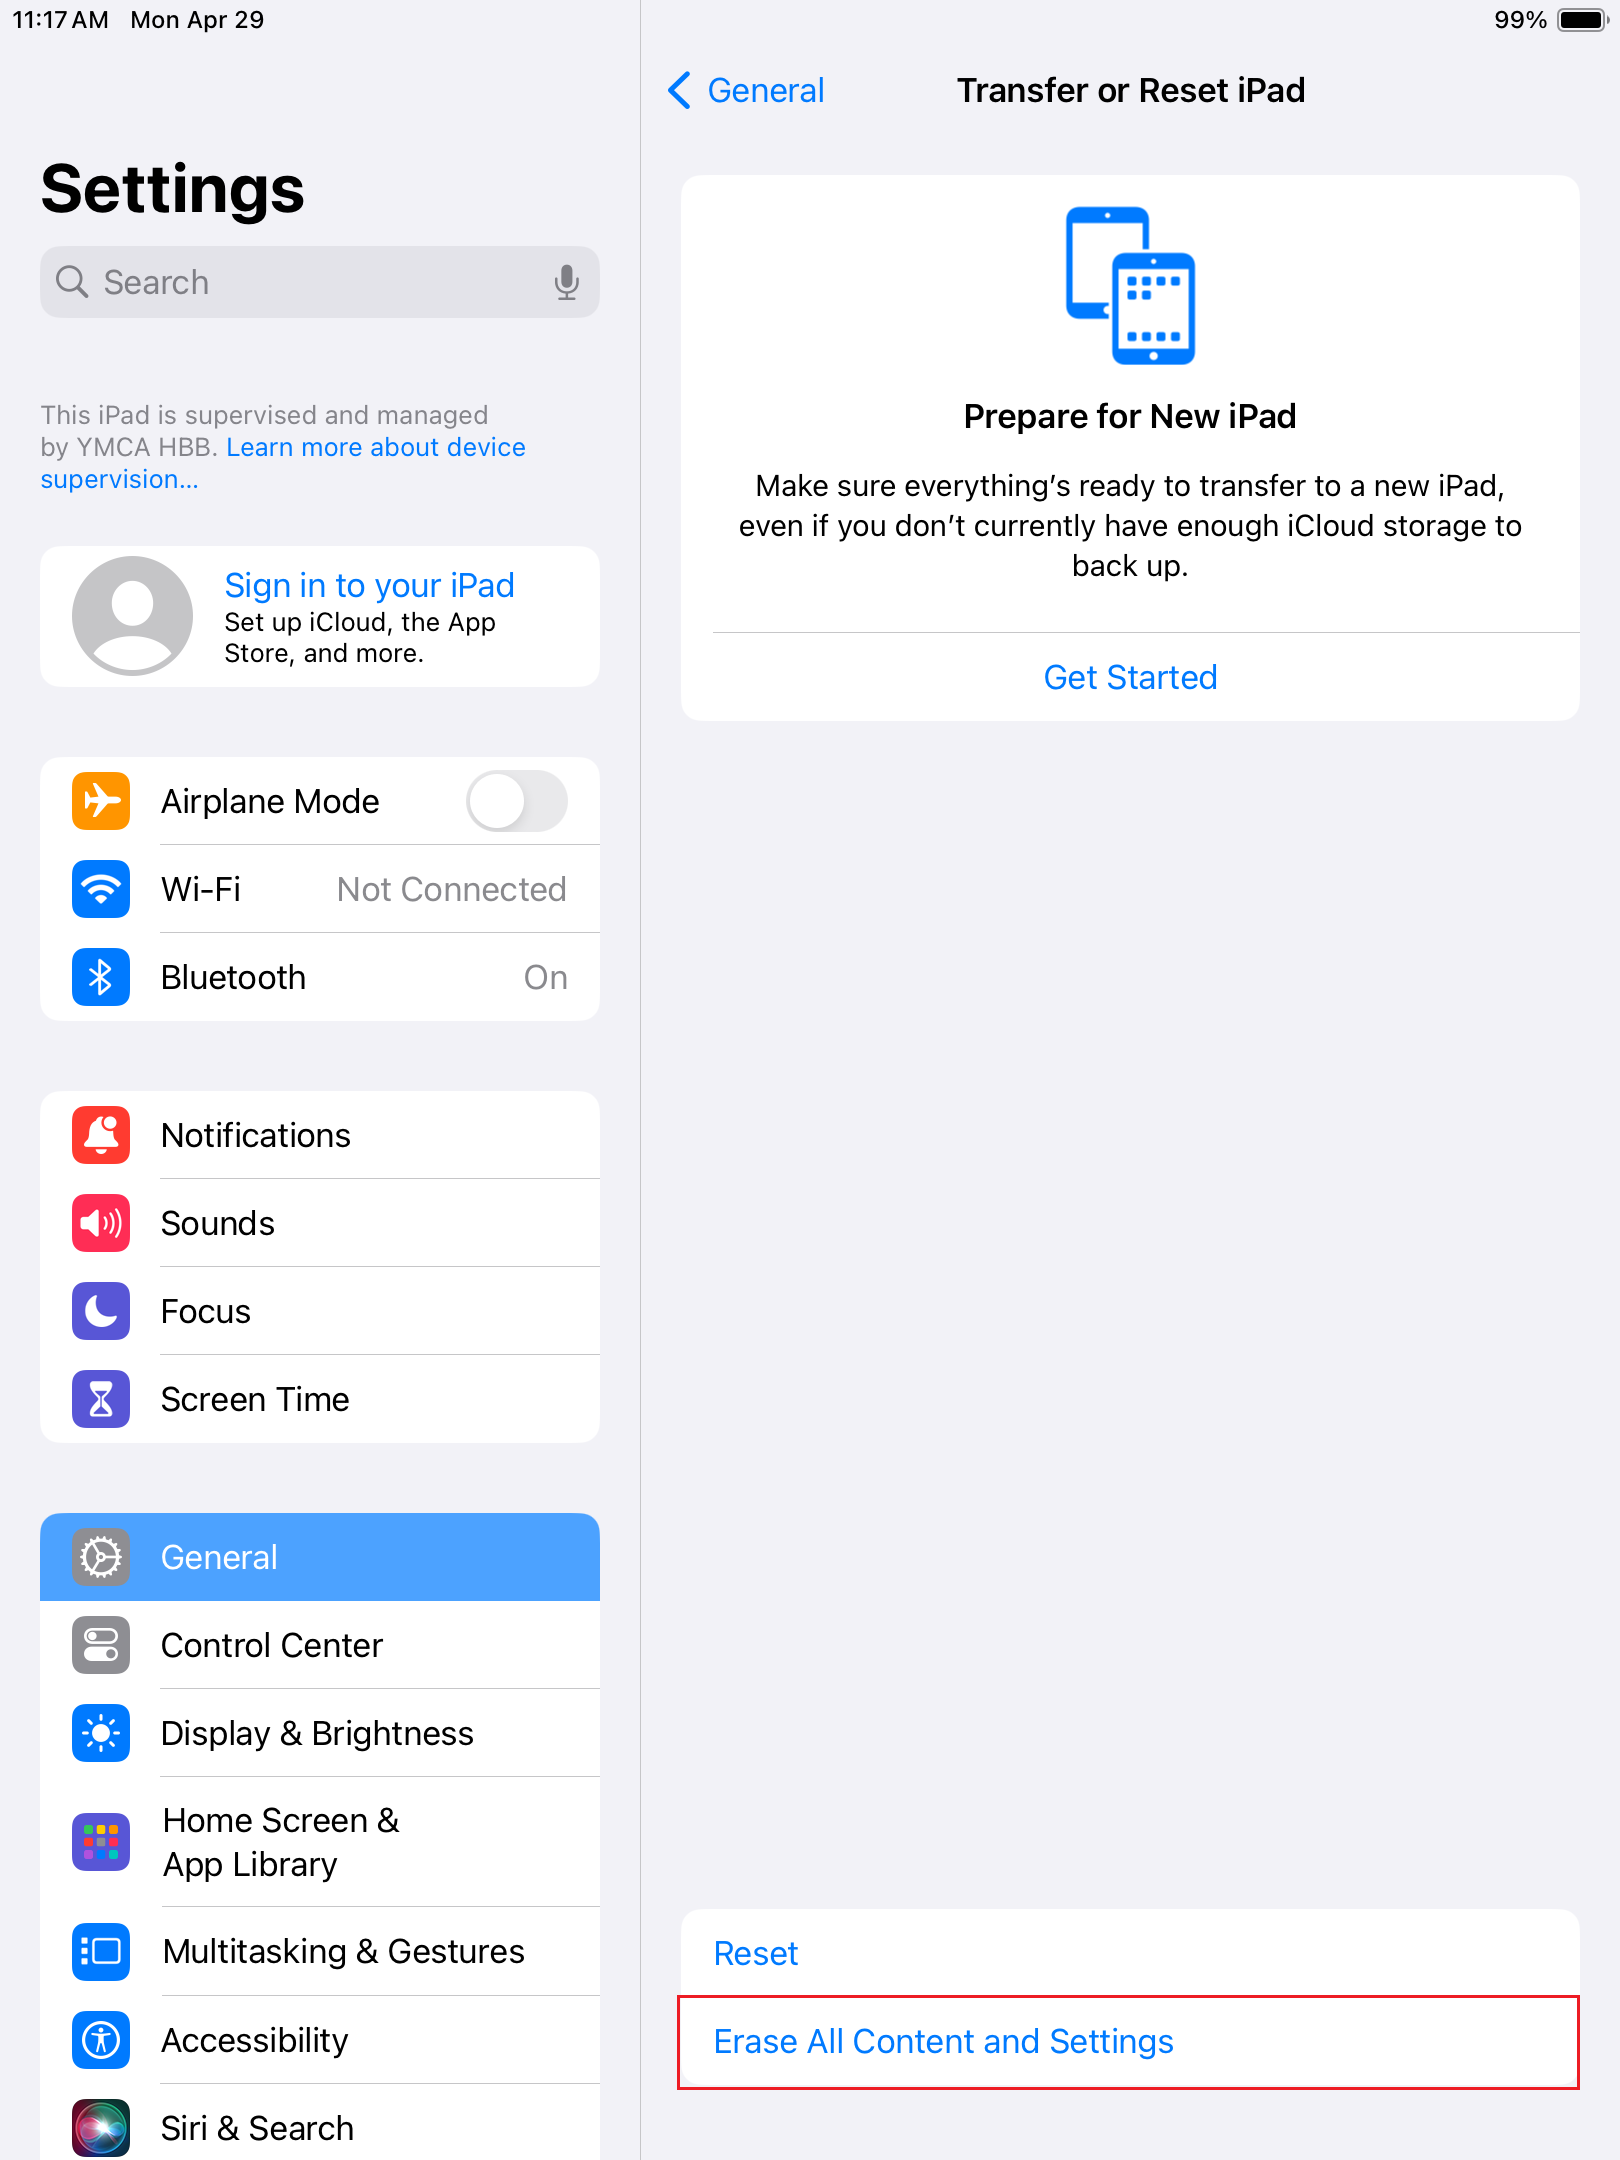
Step 3 - Click Transfer or Reset iPad
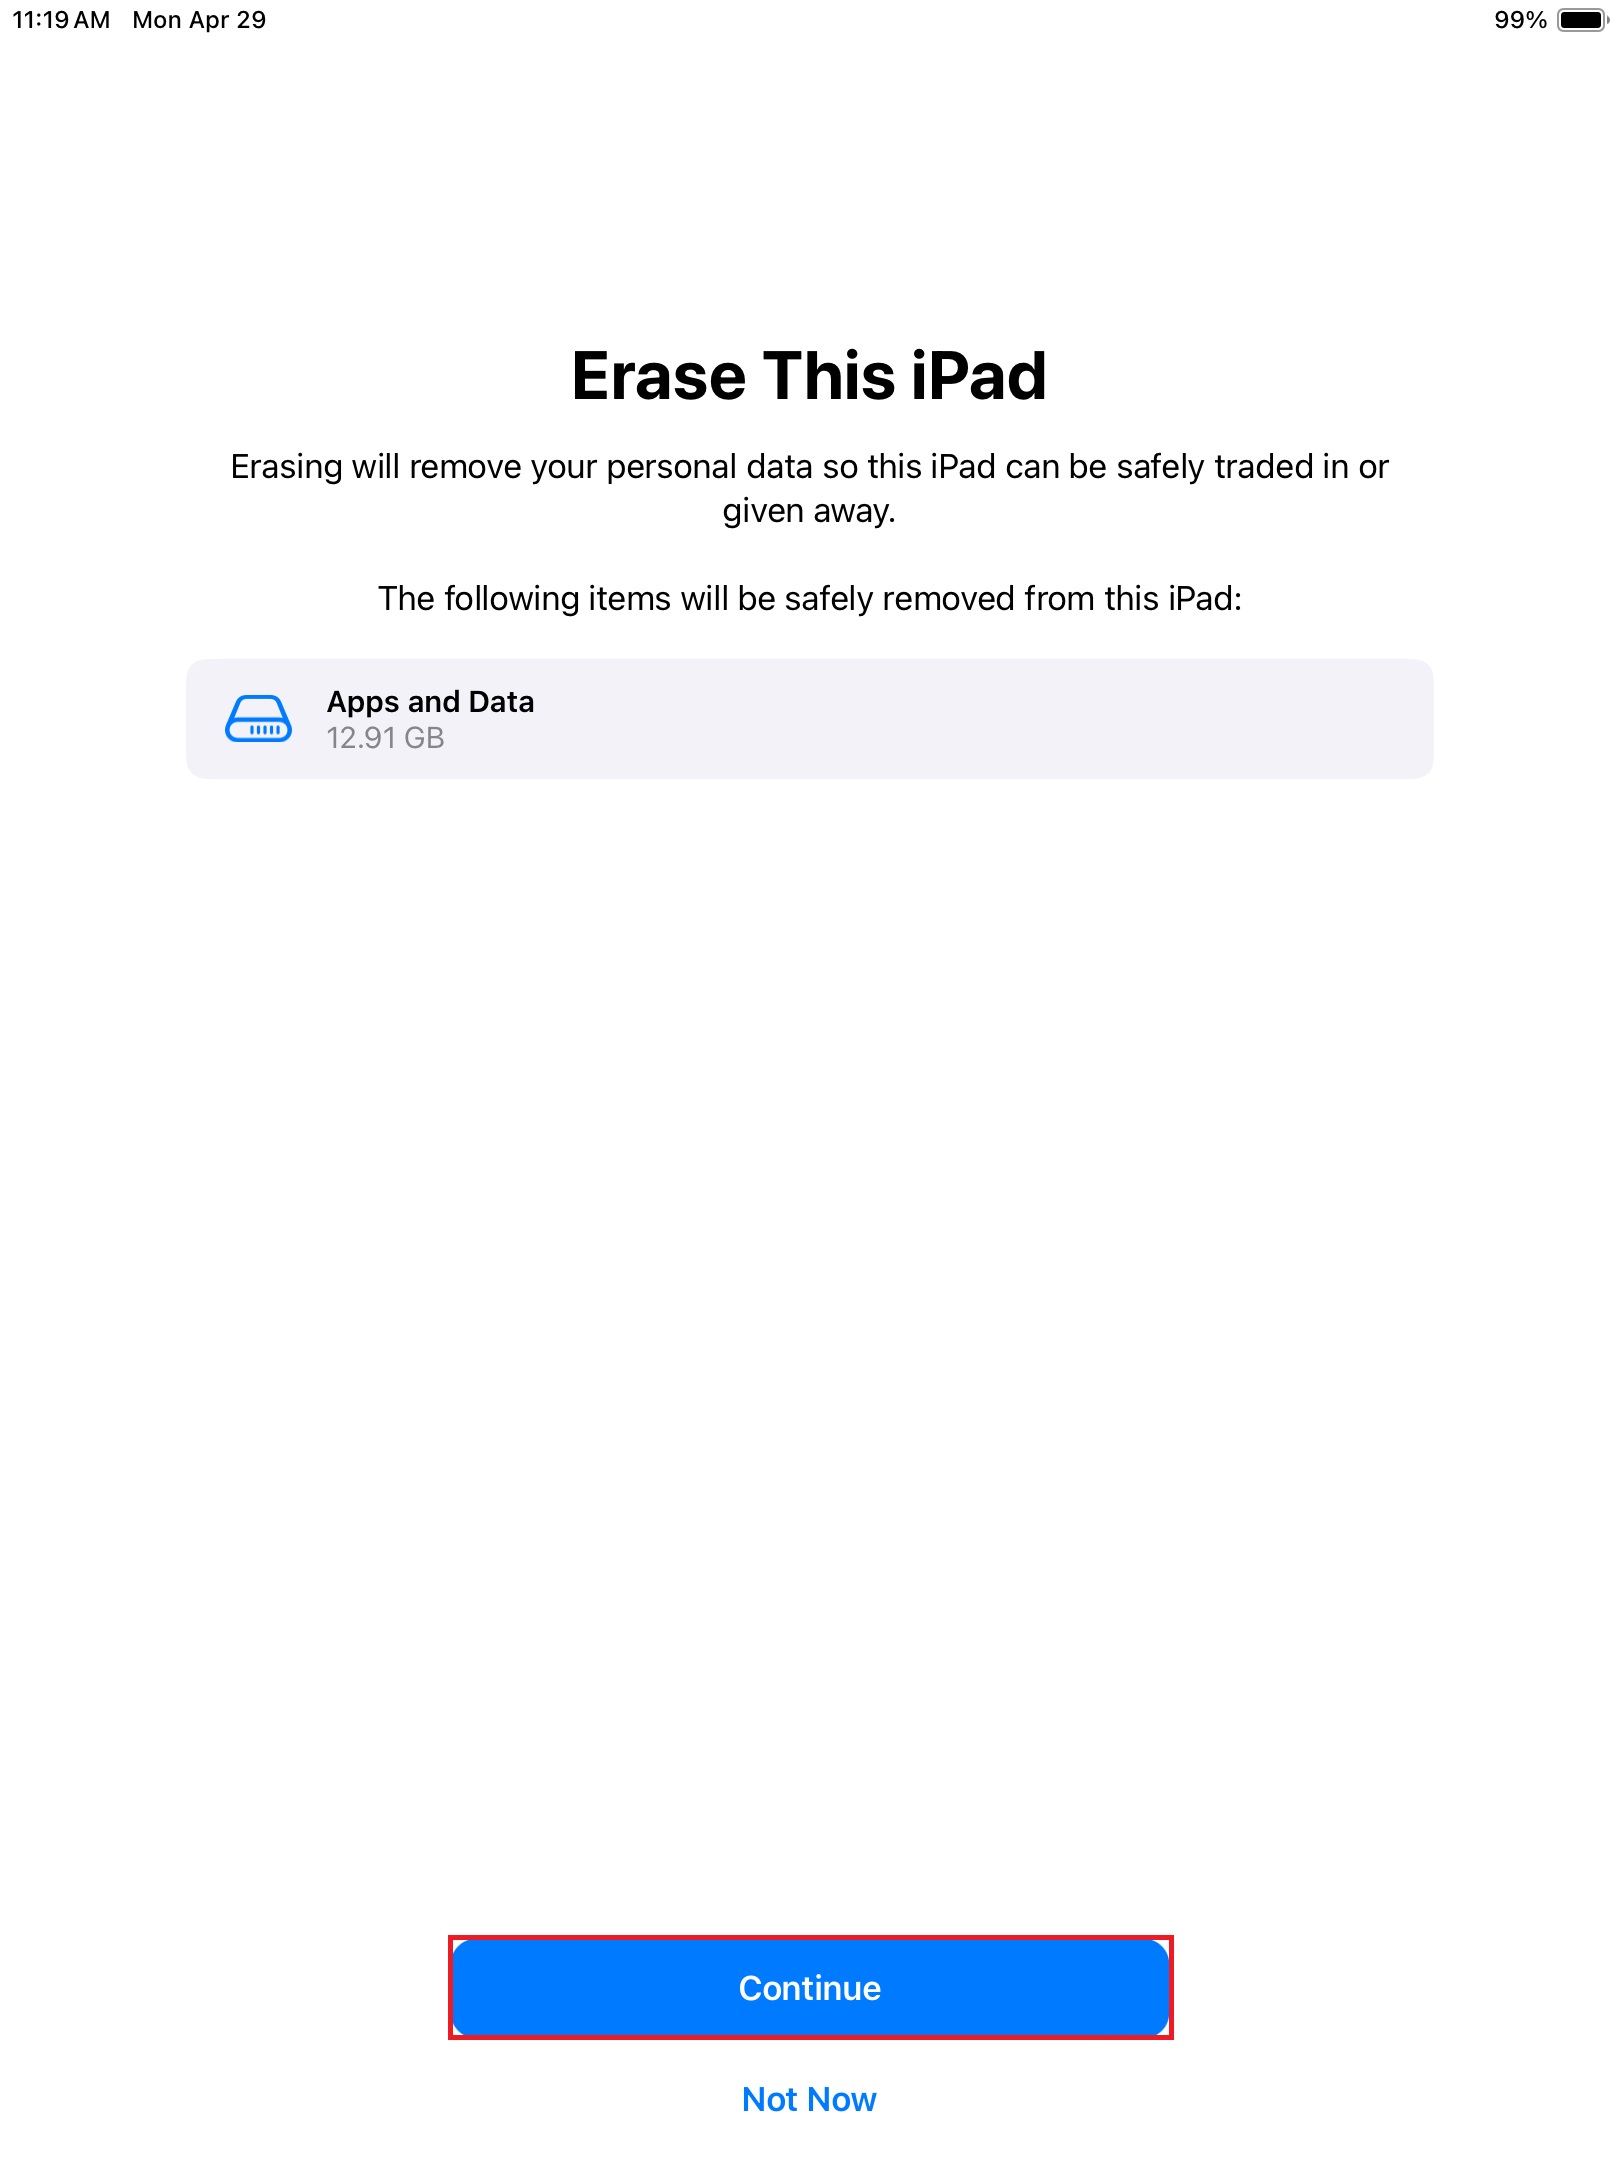
Step 4 - Click Erase All Content and Settings
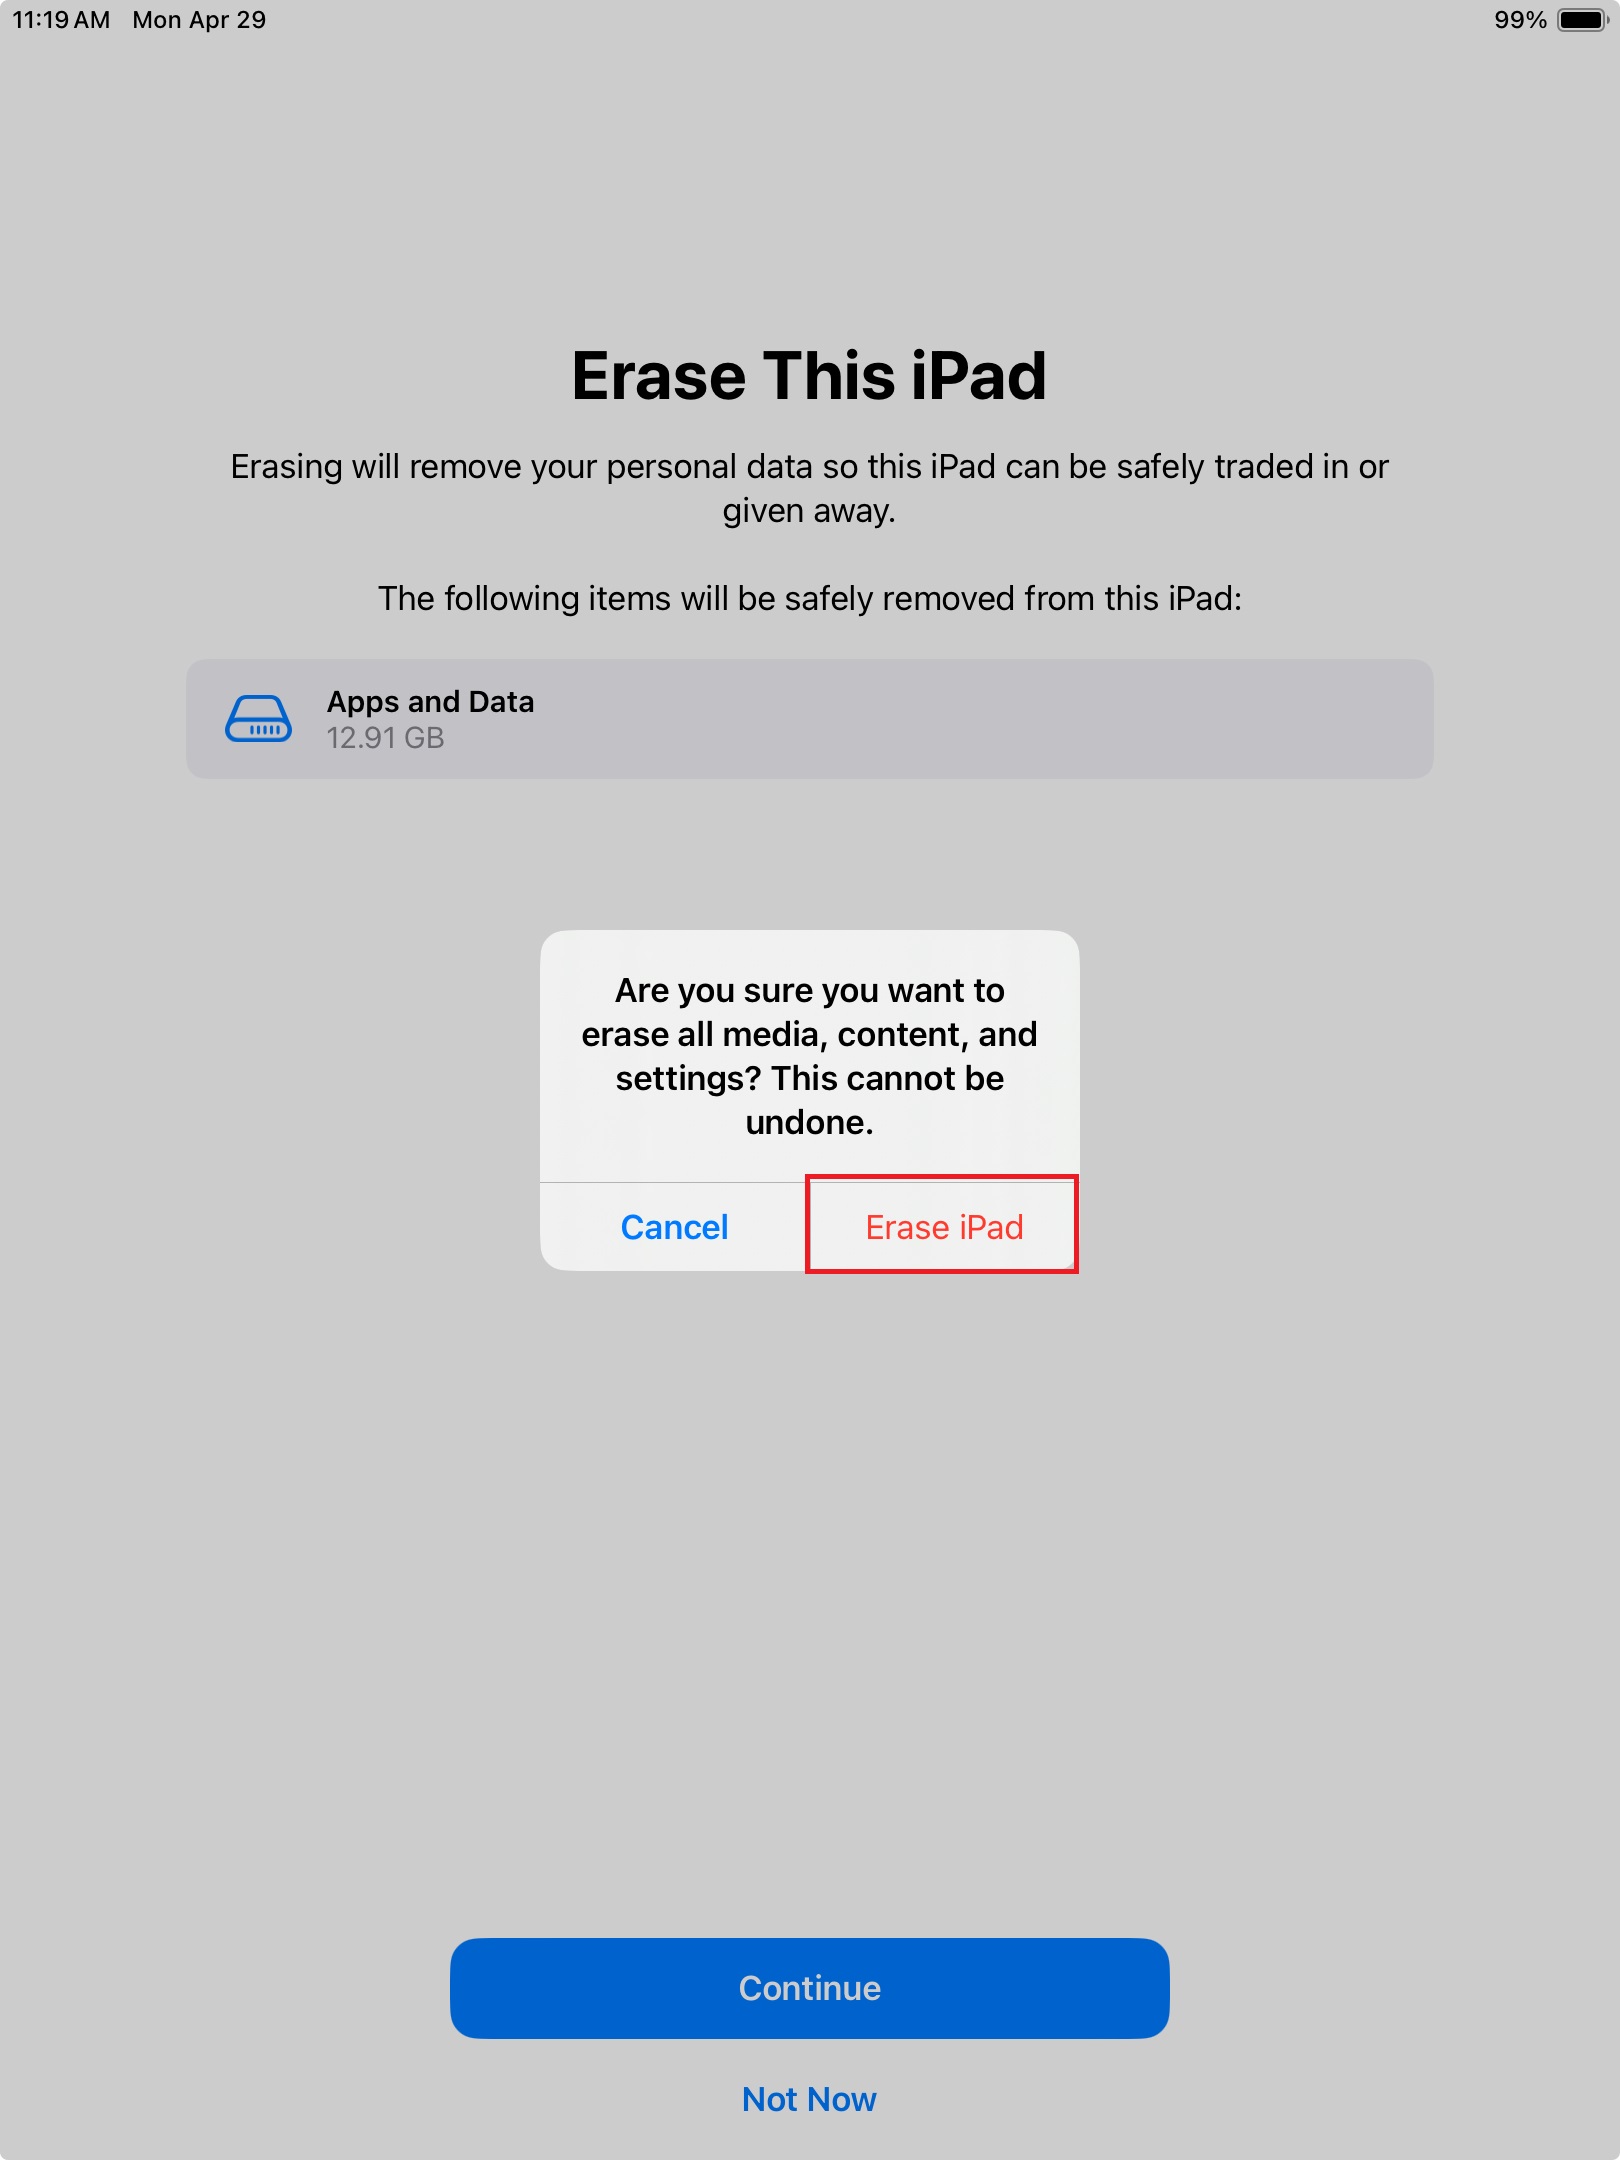
Step 5 - Click Continue
Step 6 - Click Erase iPad
Step 7 - Enter the iPad's Passcode
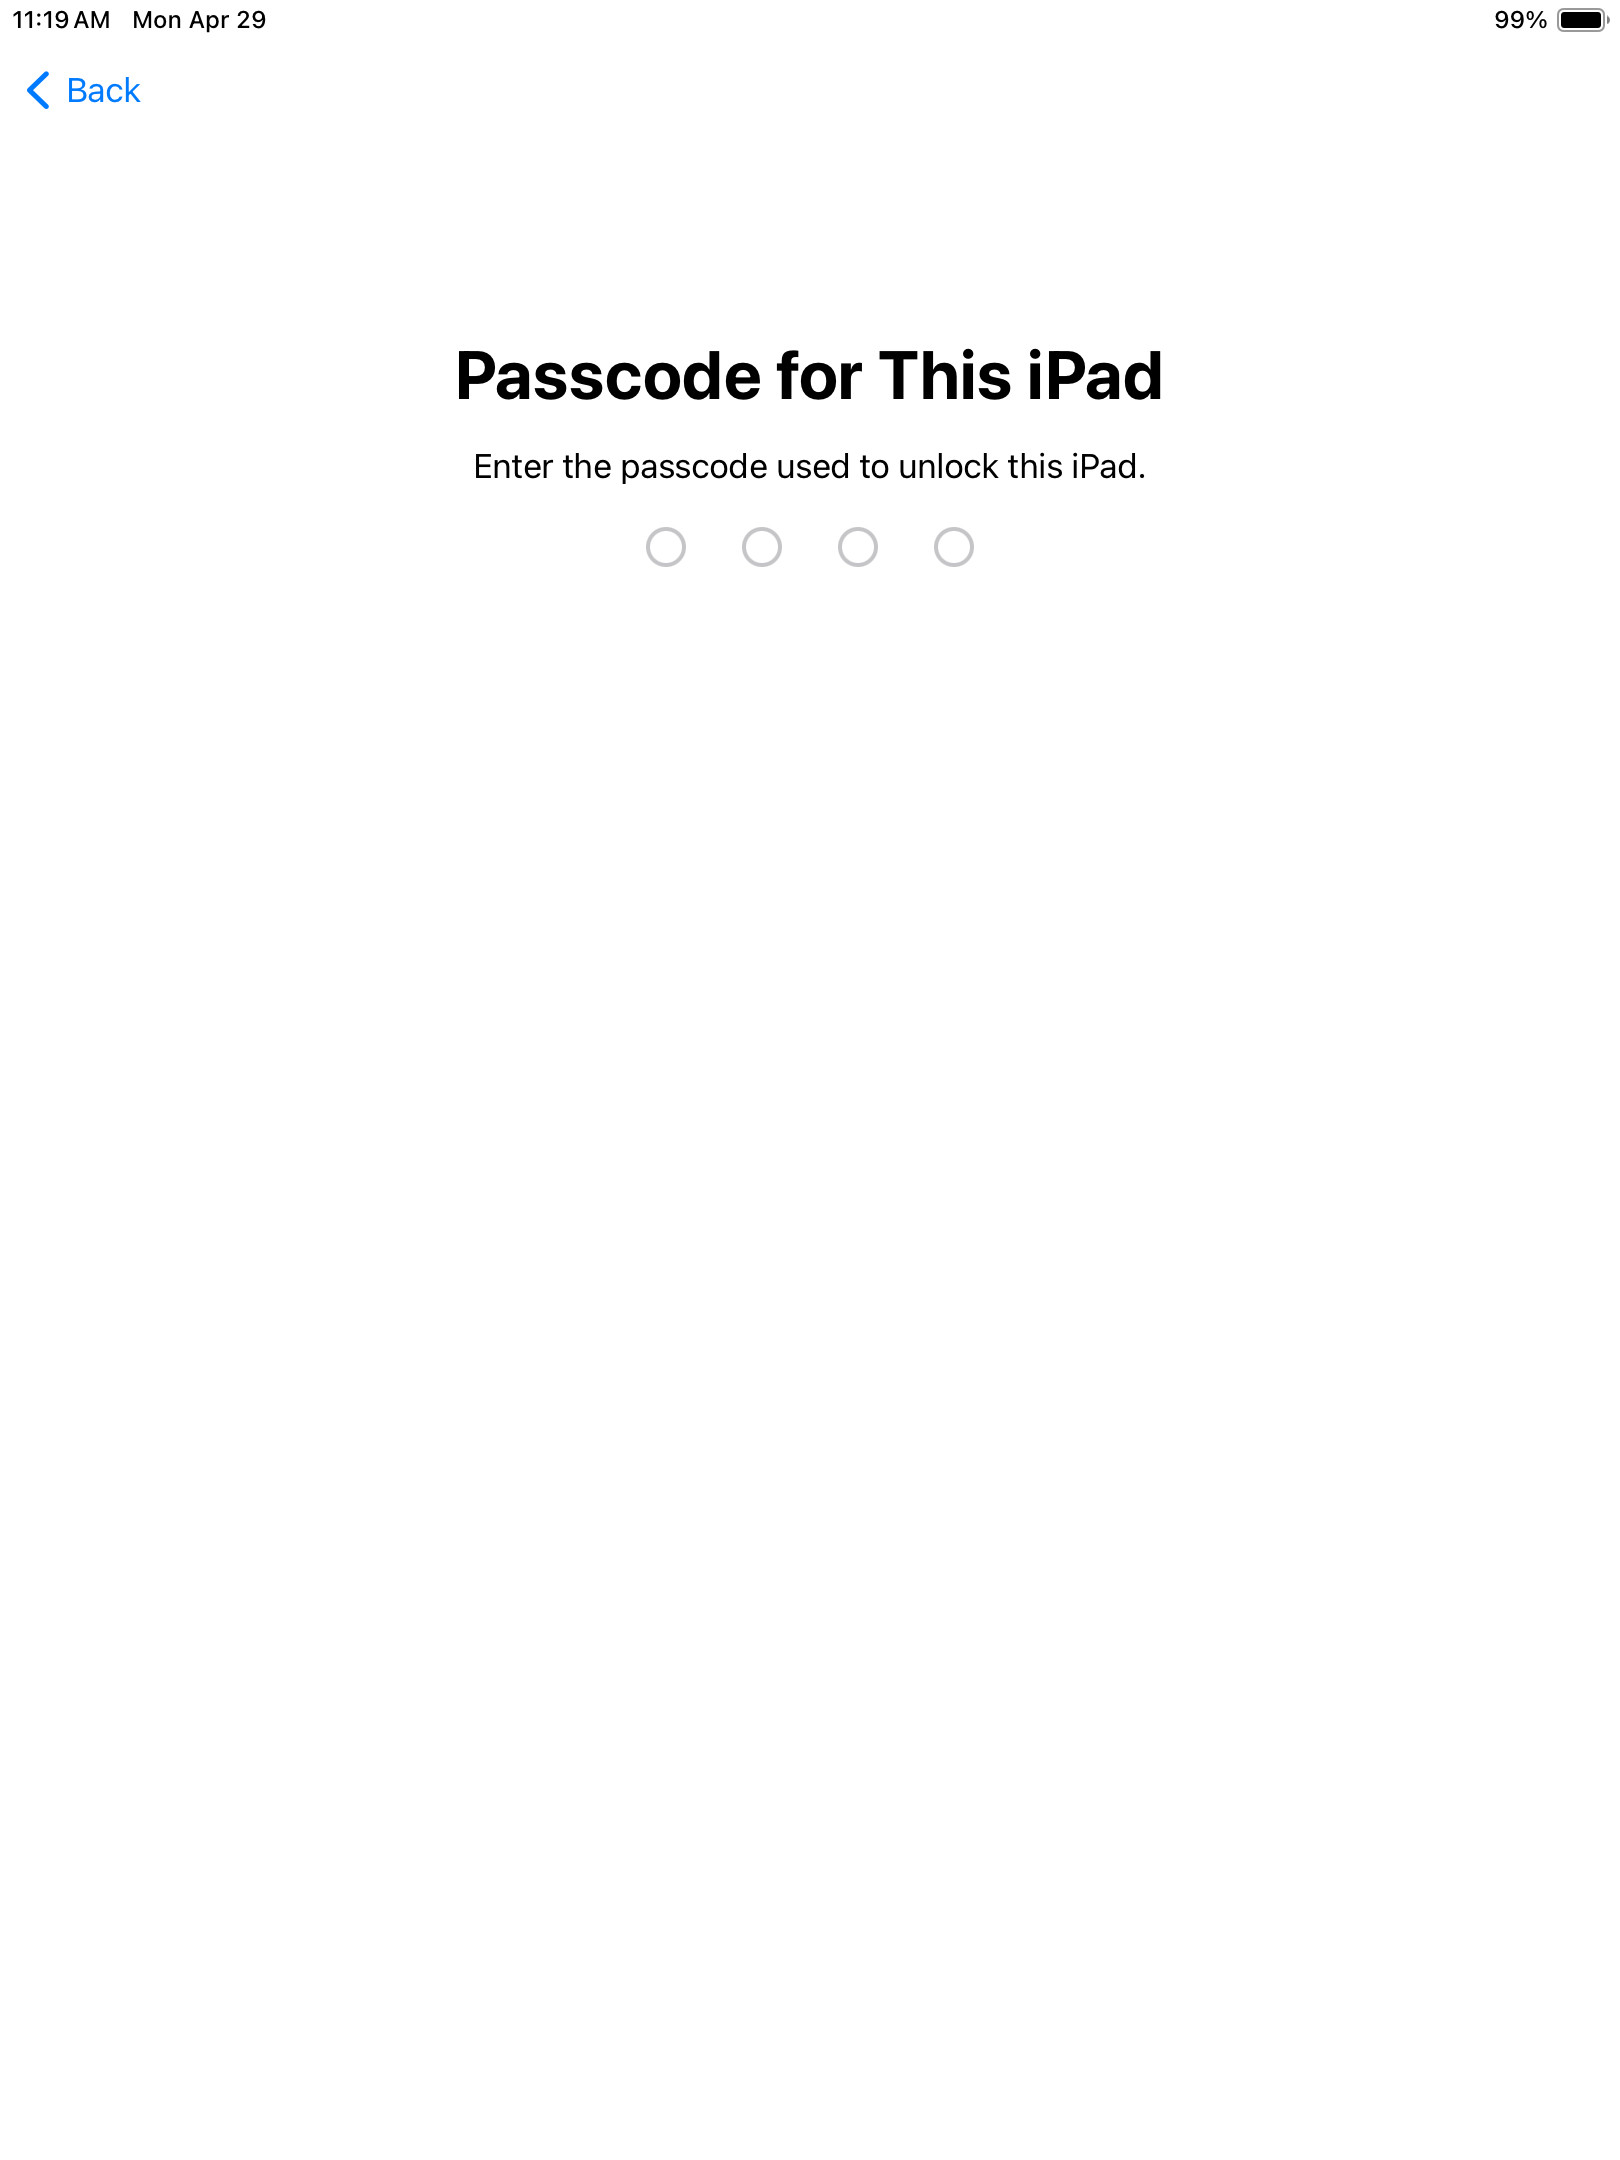
Once the passcode has been entered the iPad will begin to erase everything and reset to factory settings.
Step 8 - Click the home button to begin setting up the iPad
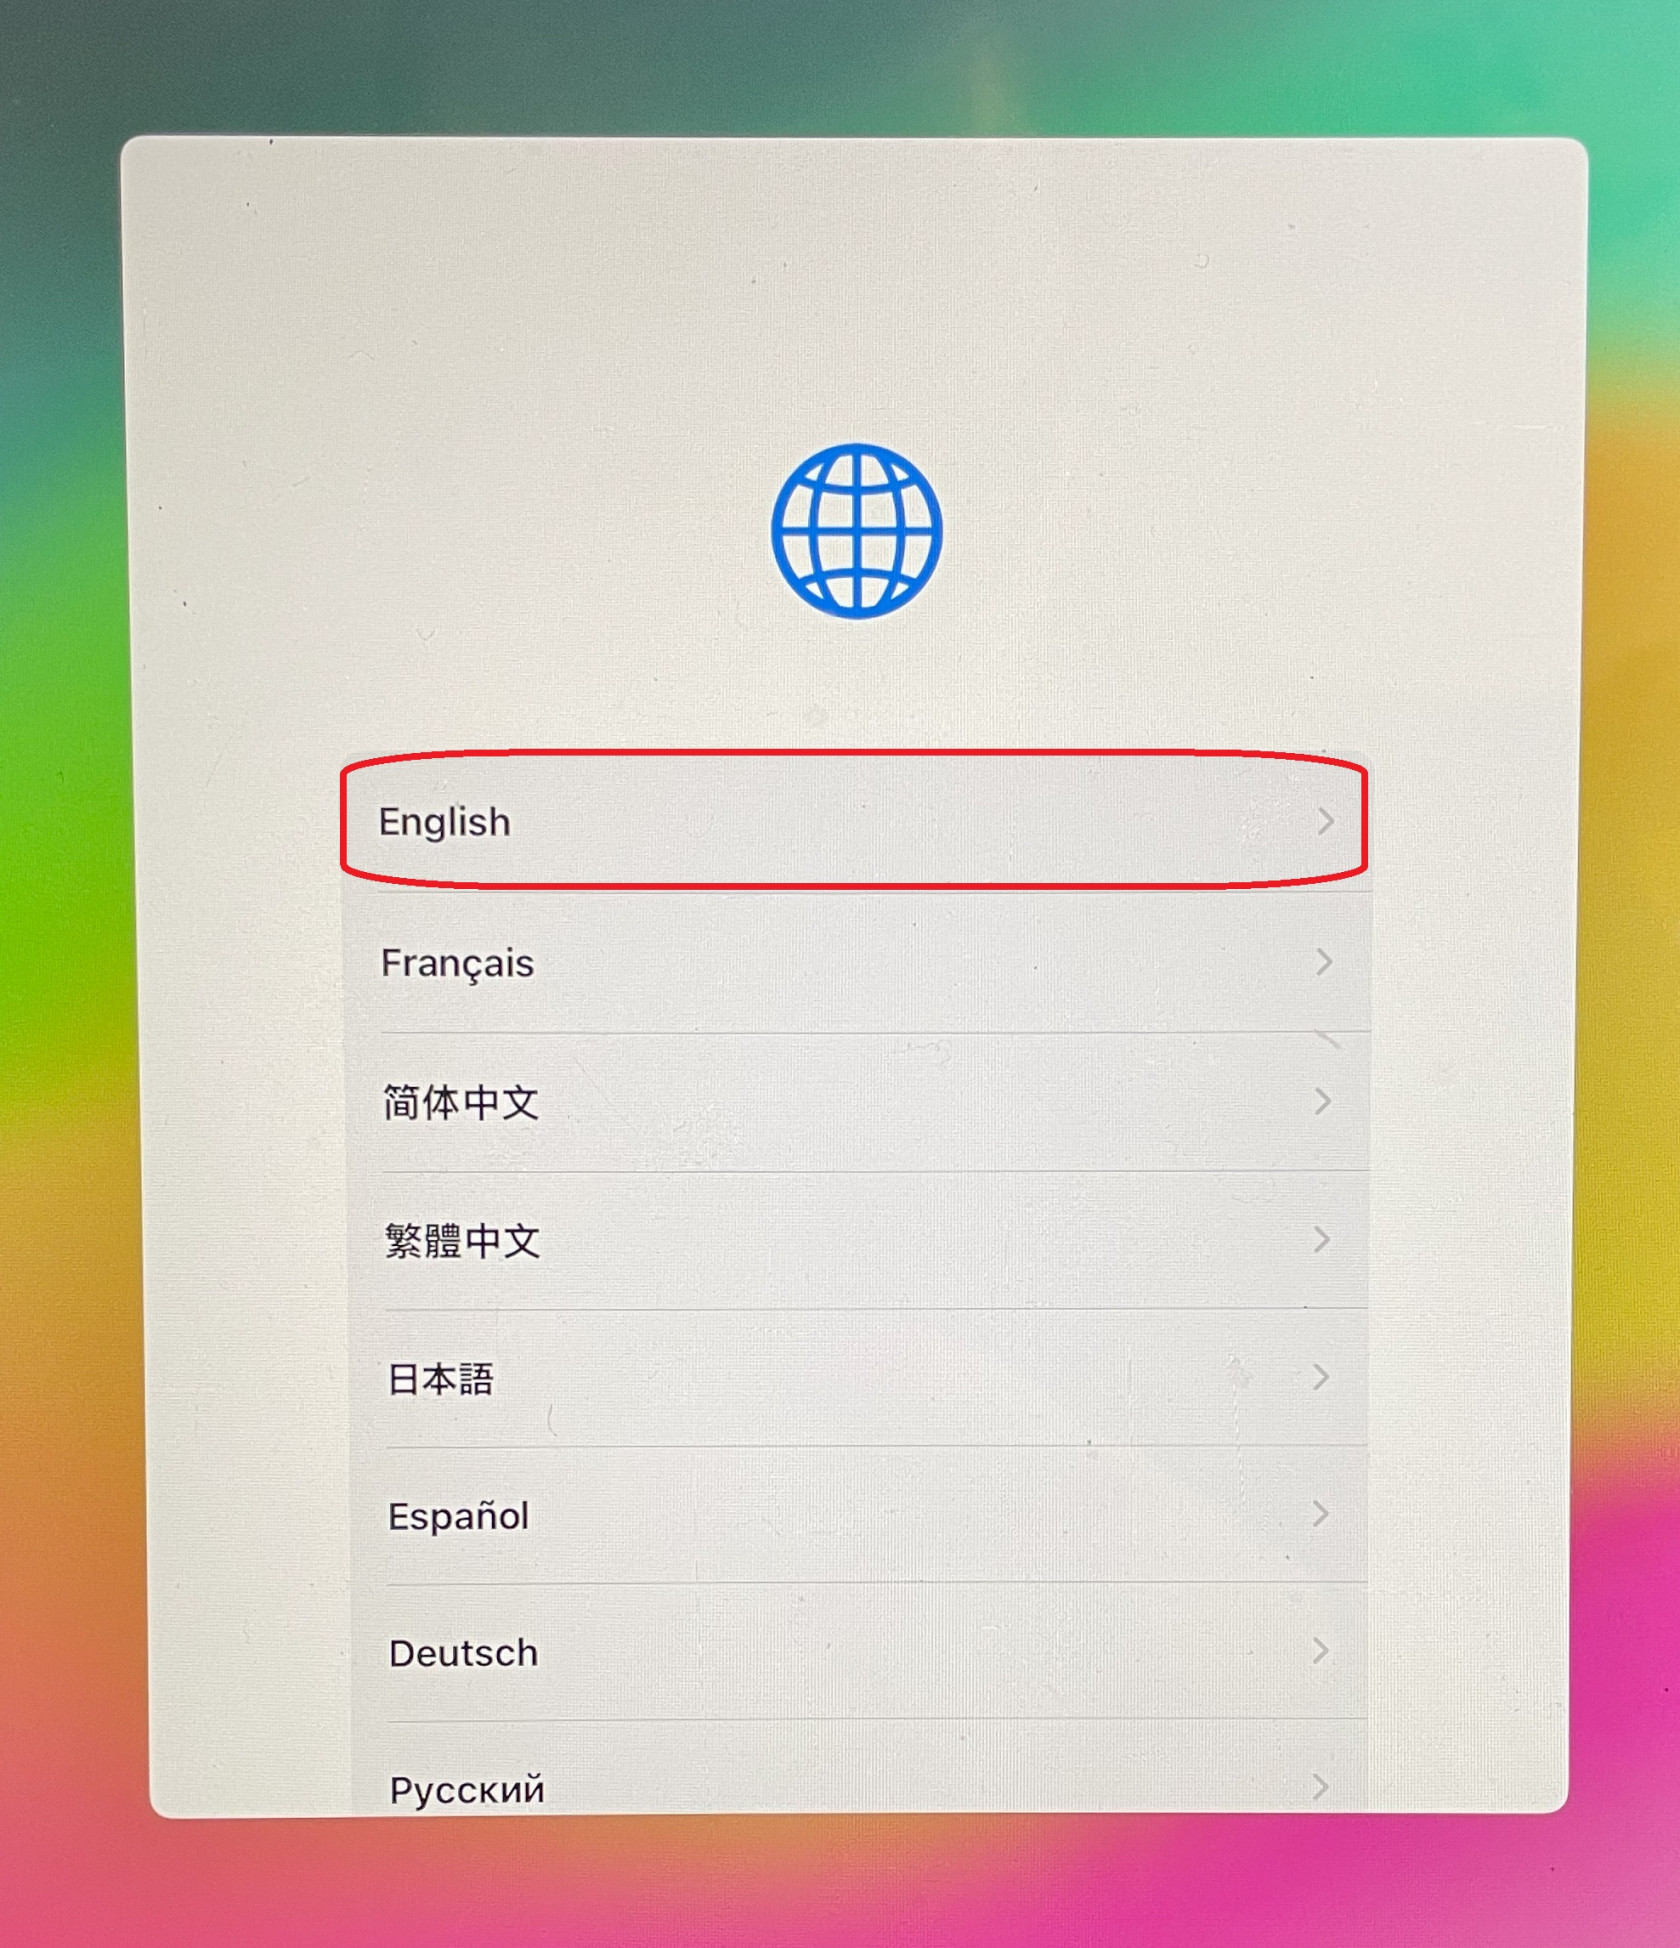
Step 9 - Click English
Step 10 - Click Canada

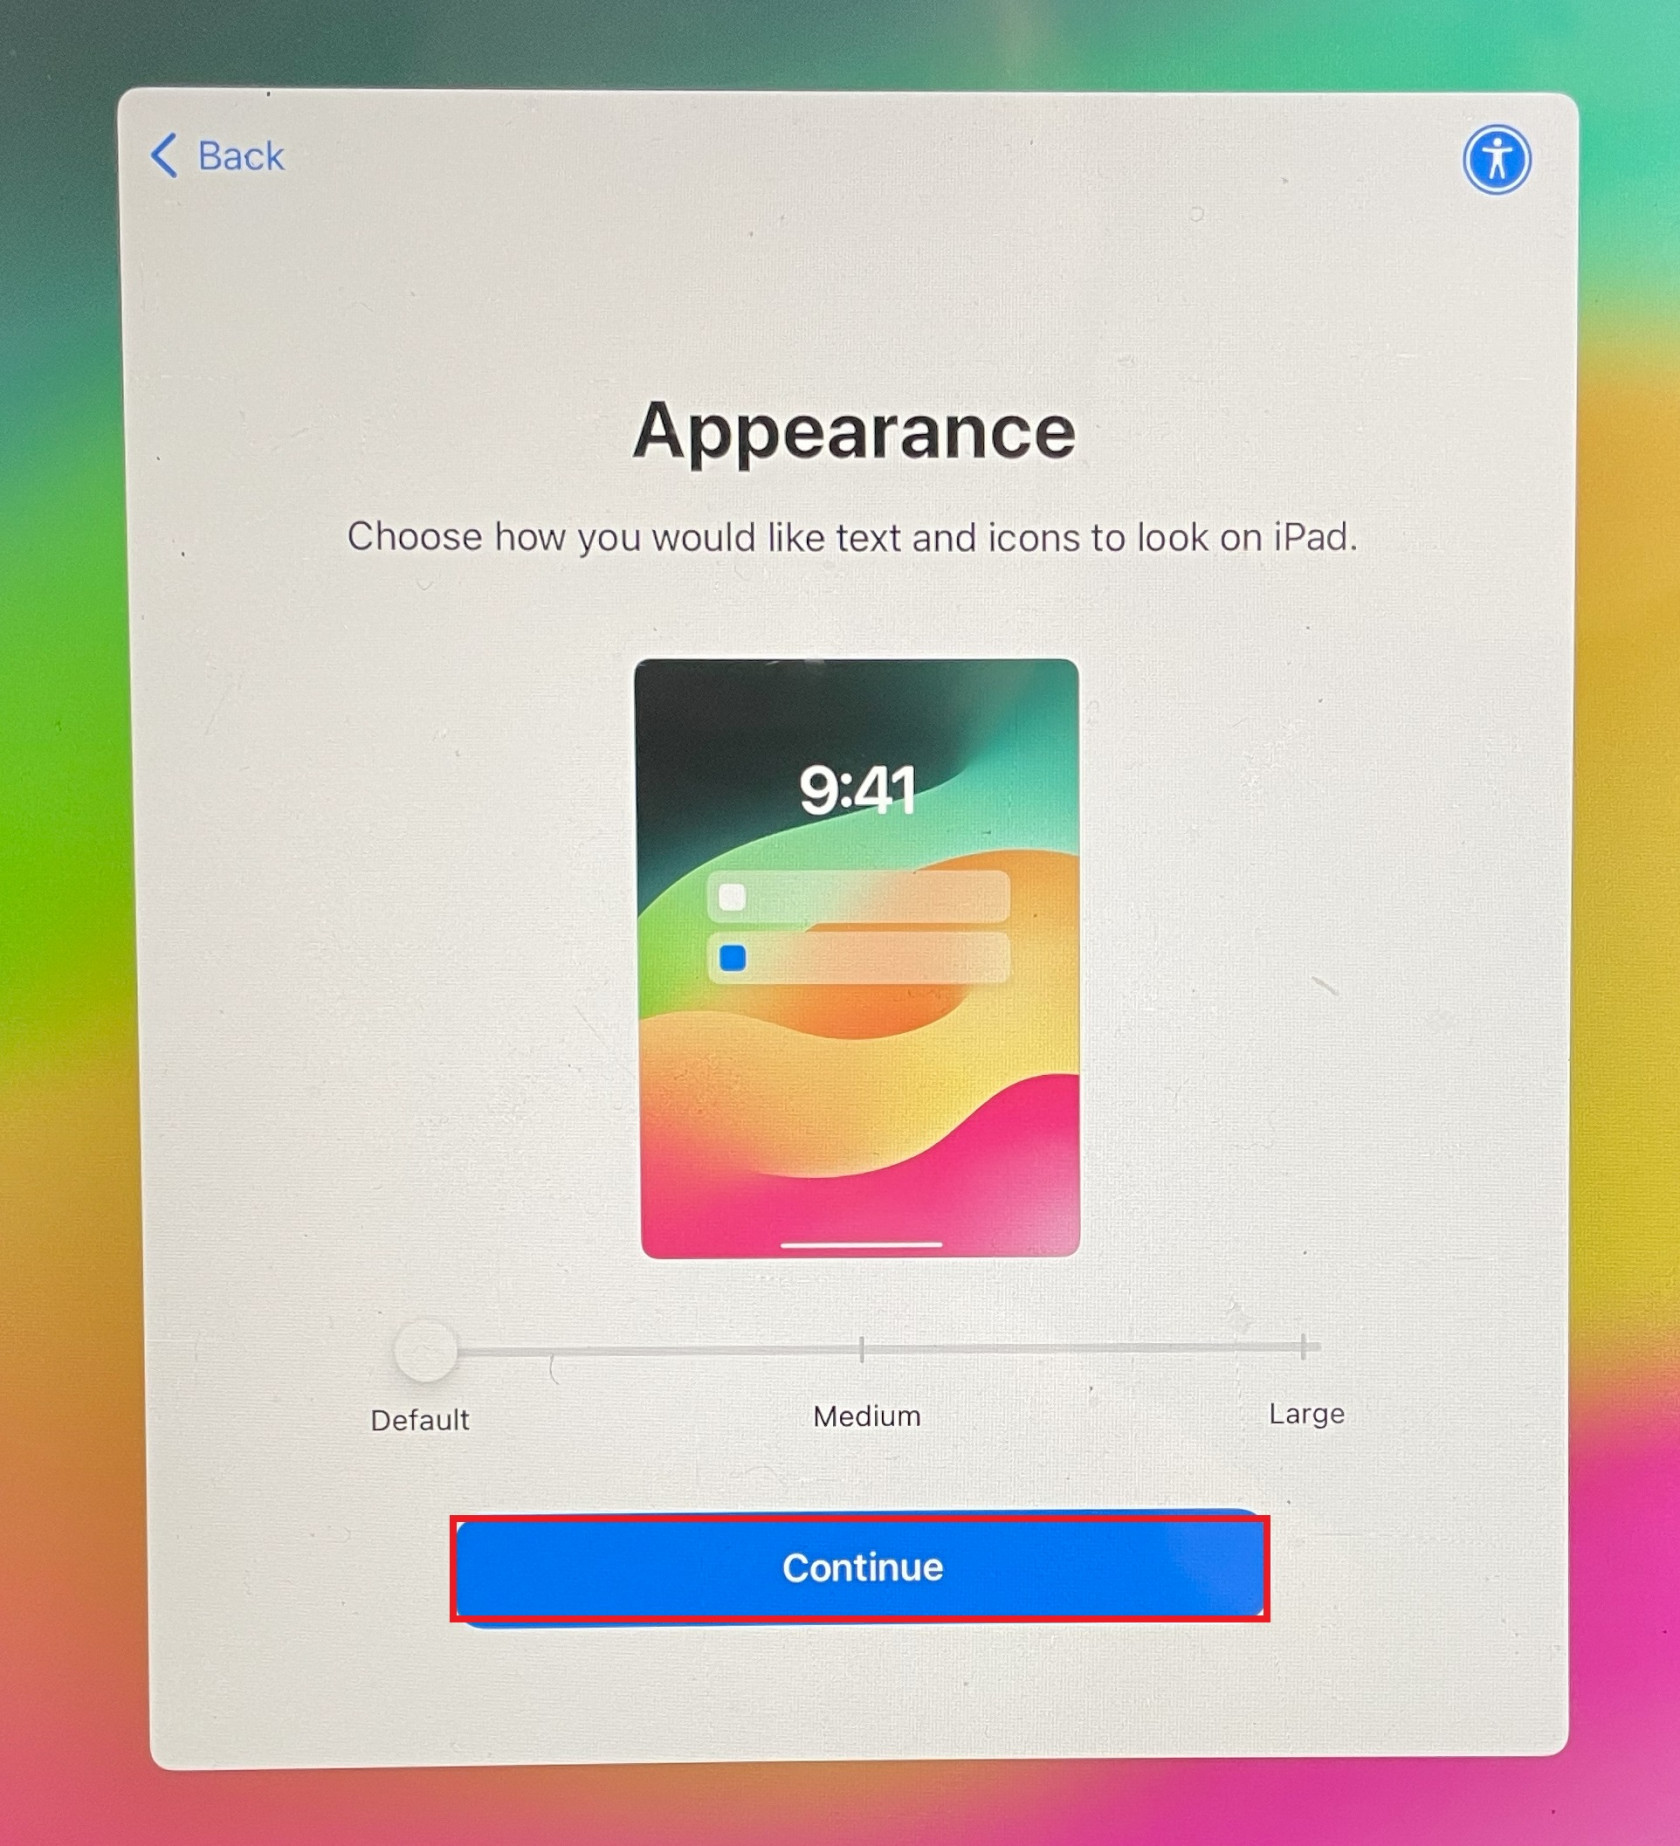
Step 11 - Click Continue
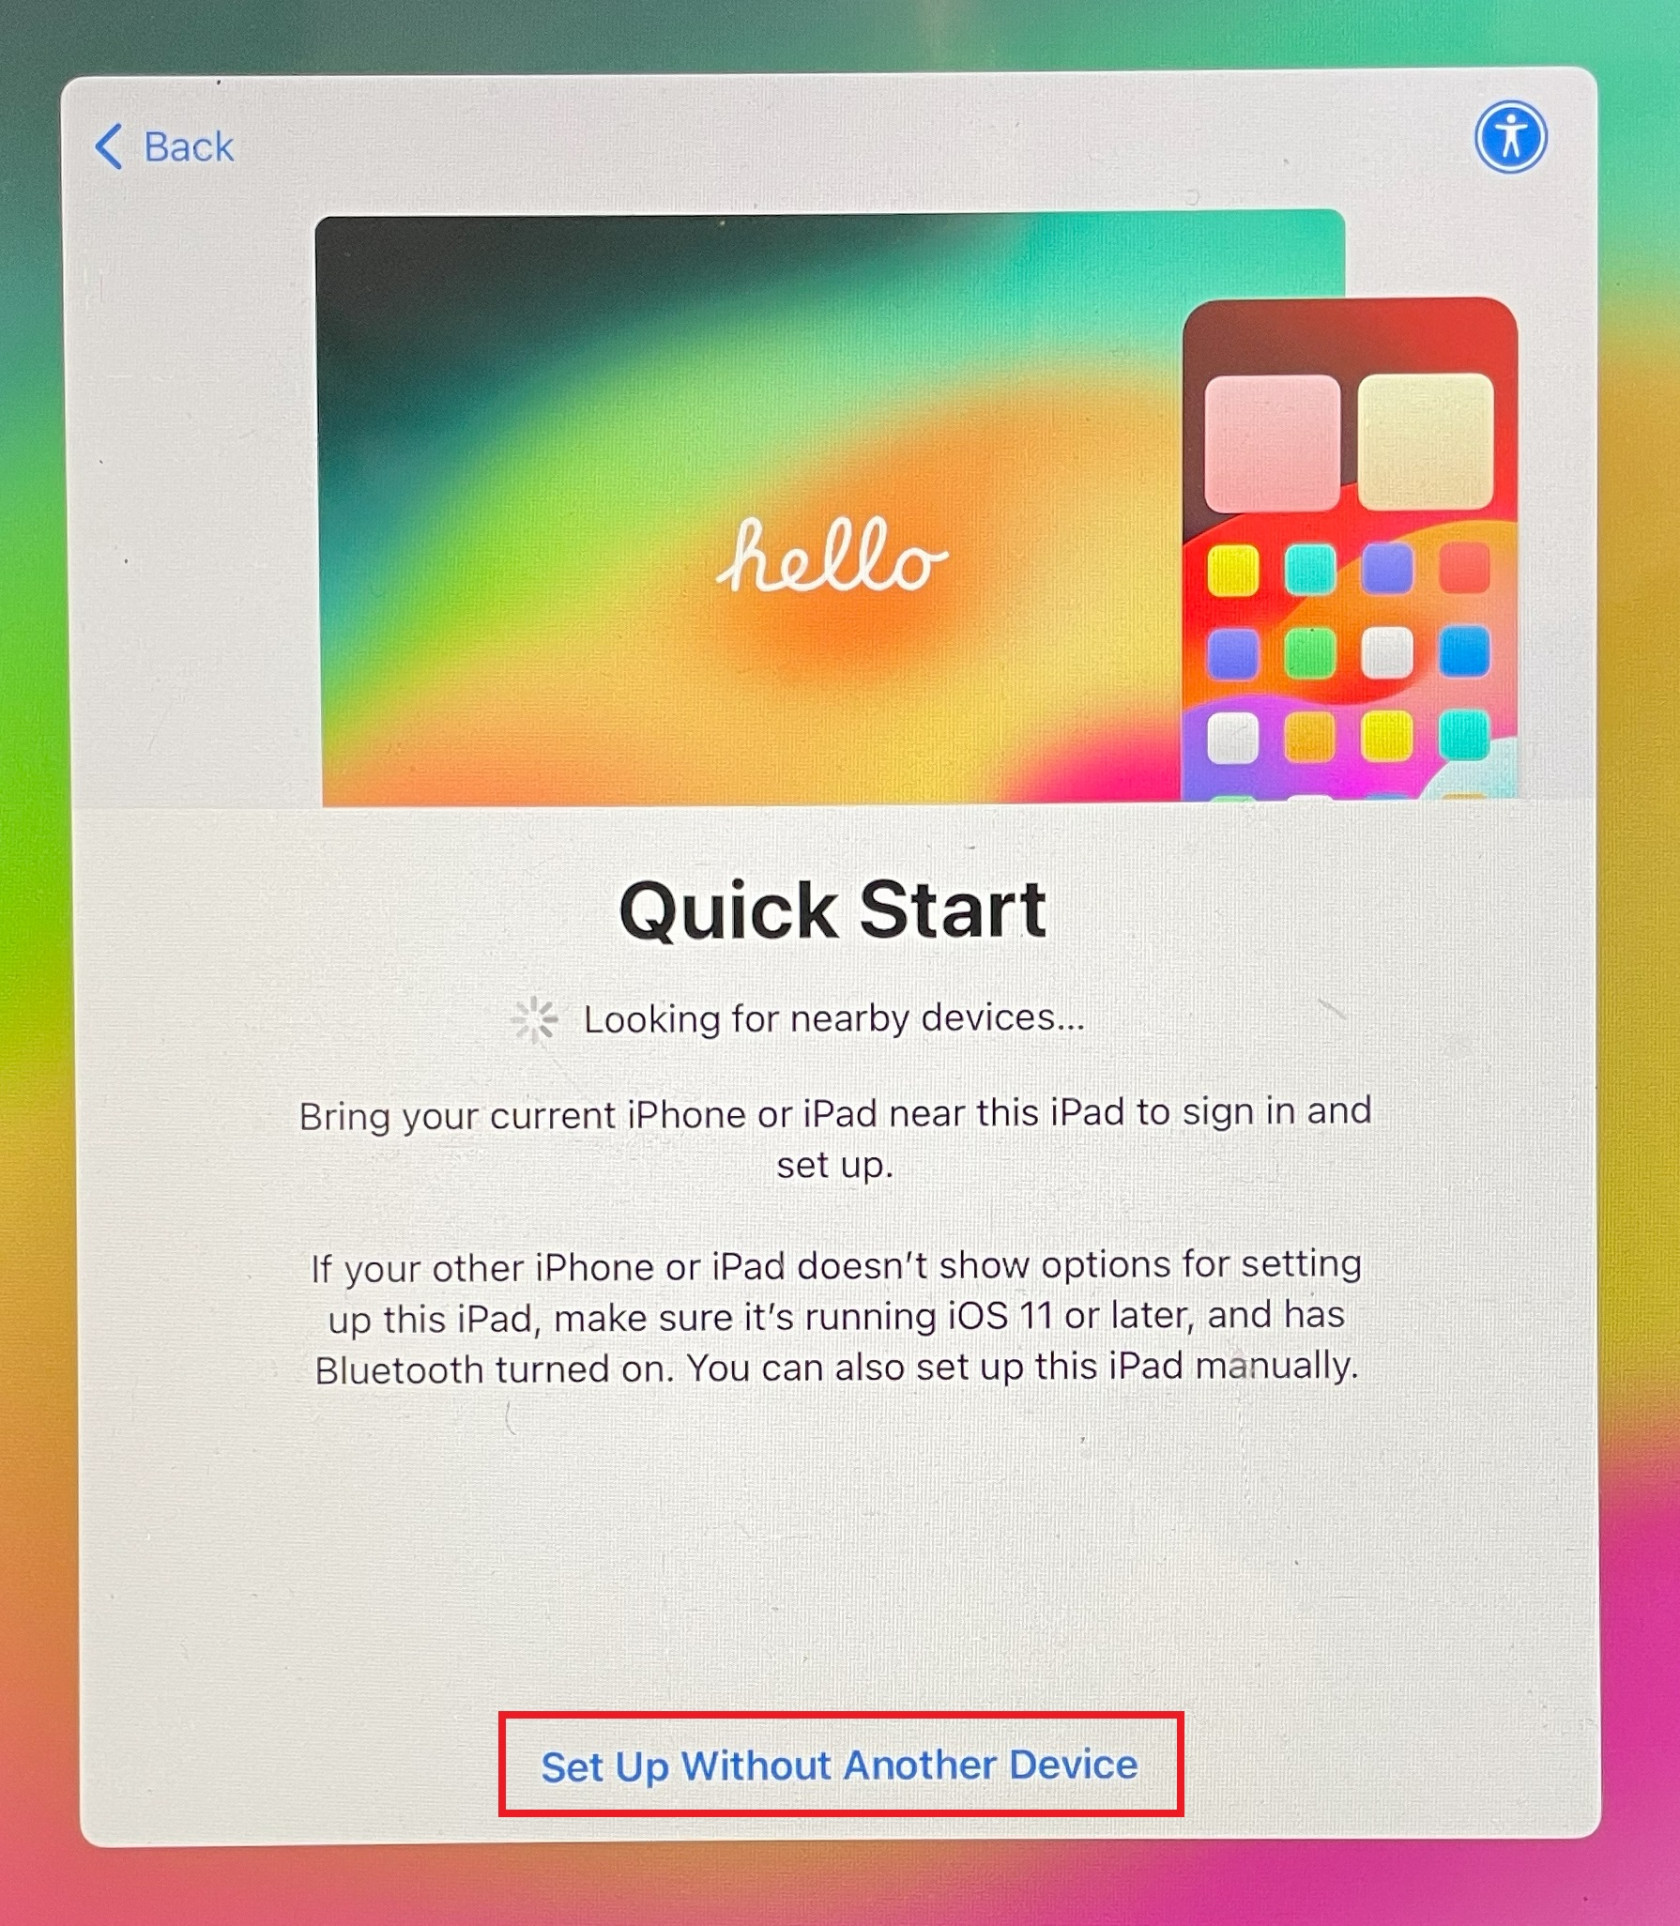
Step 12 - Click Set up without another device
Step 13 - Connect to a Wi-Fi Network or Mobile Hotspot
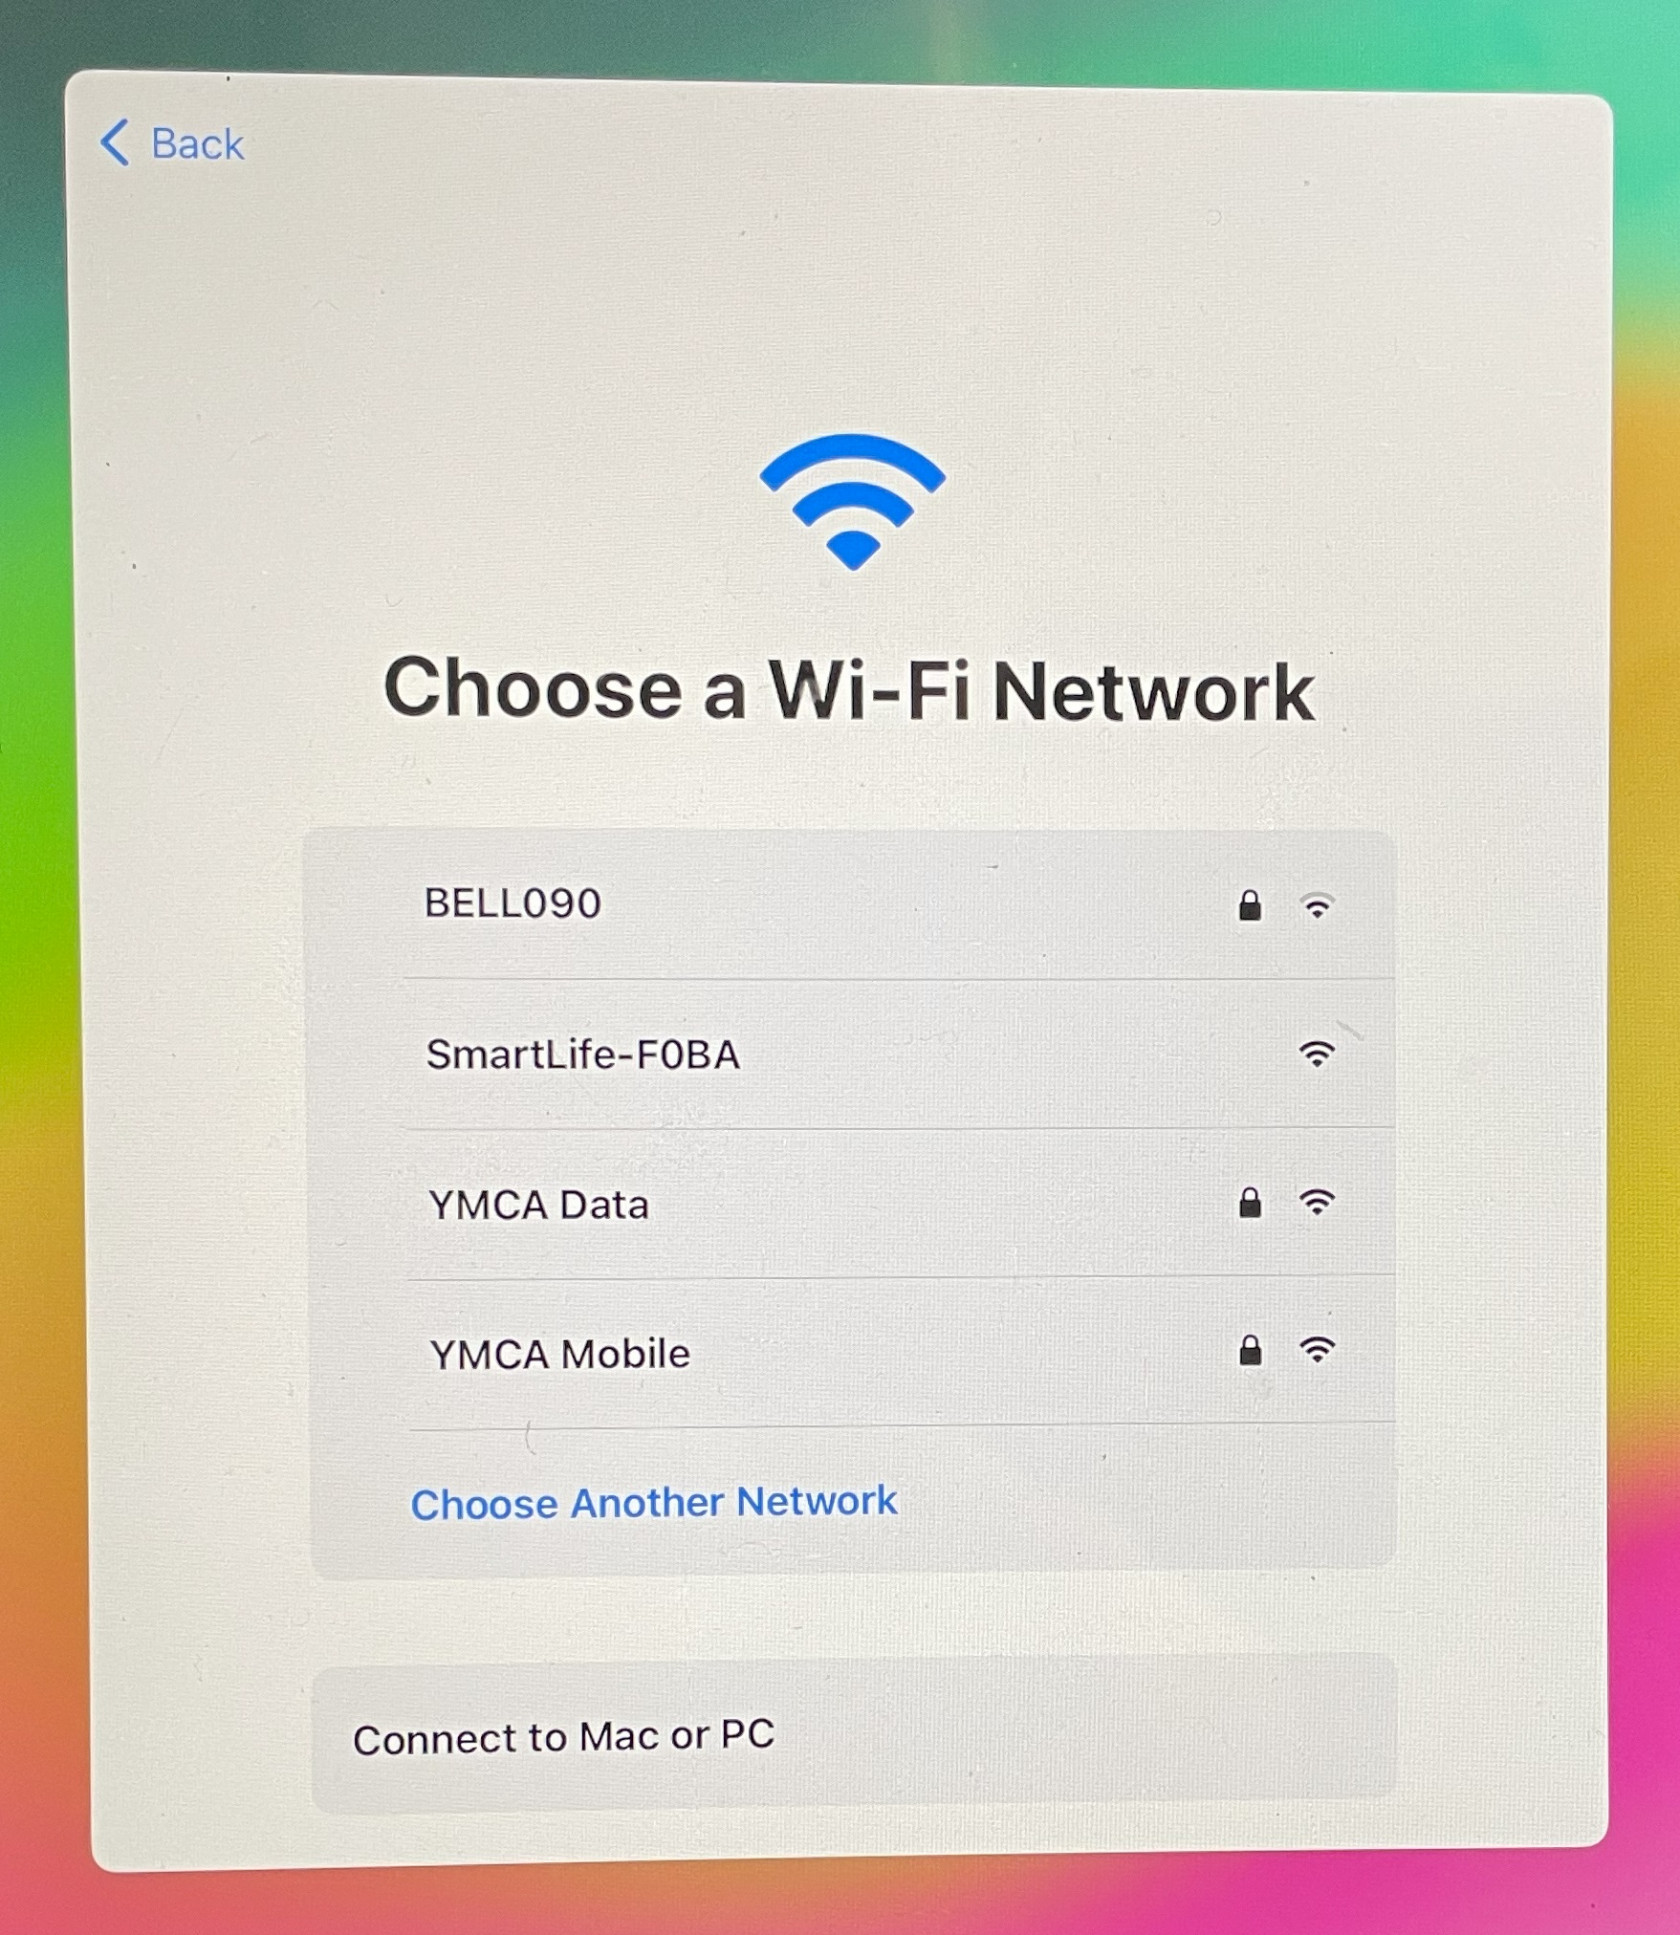
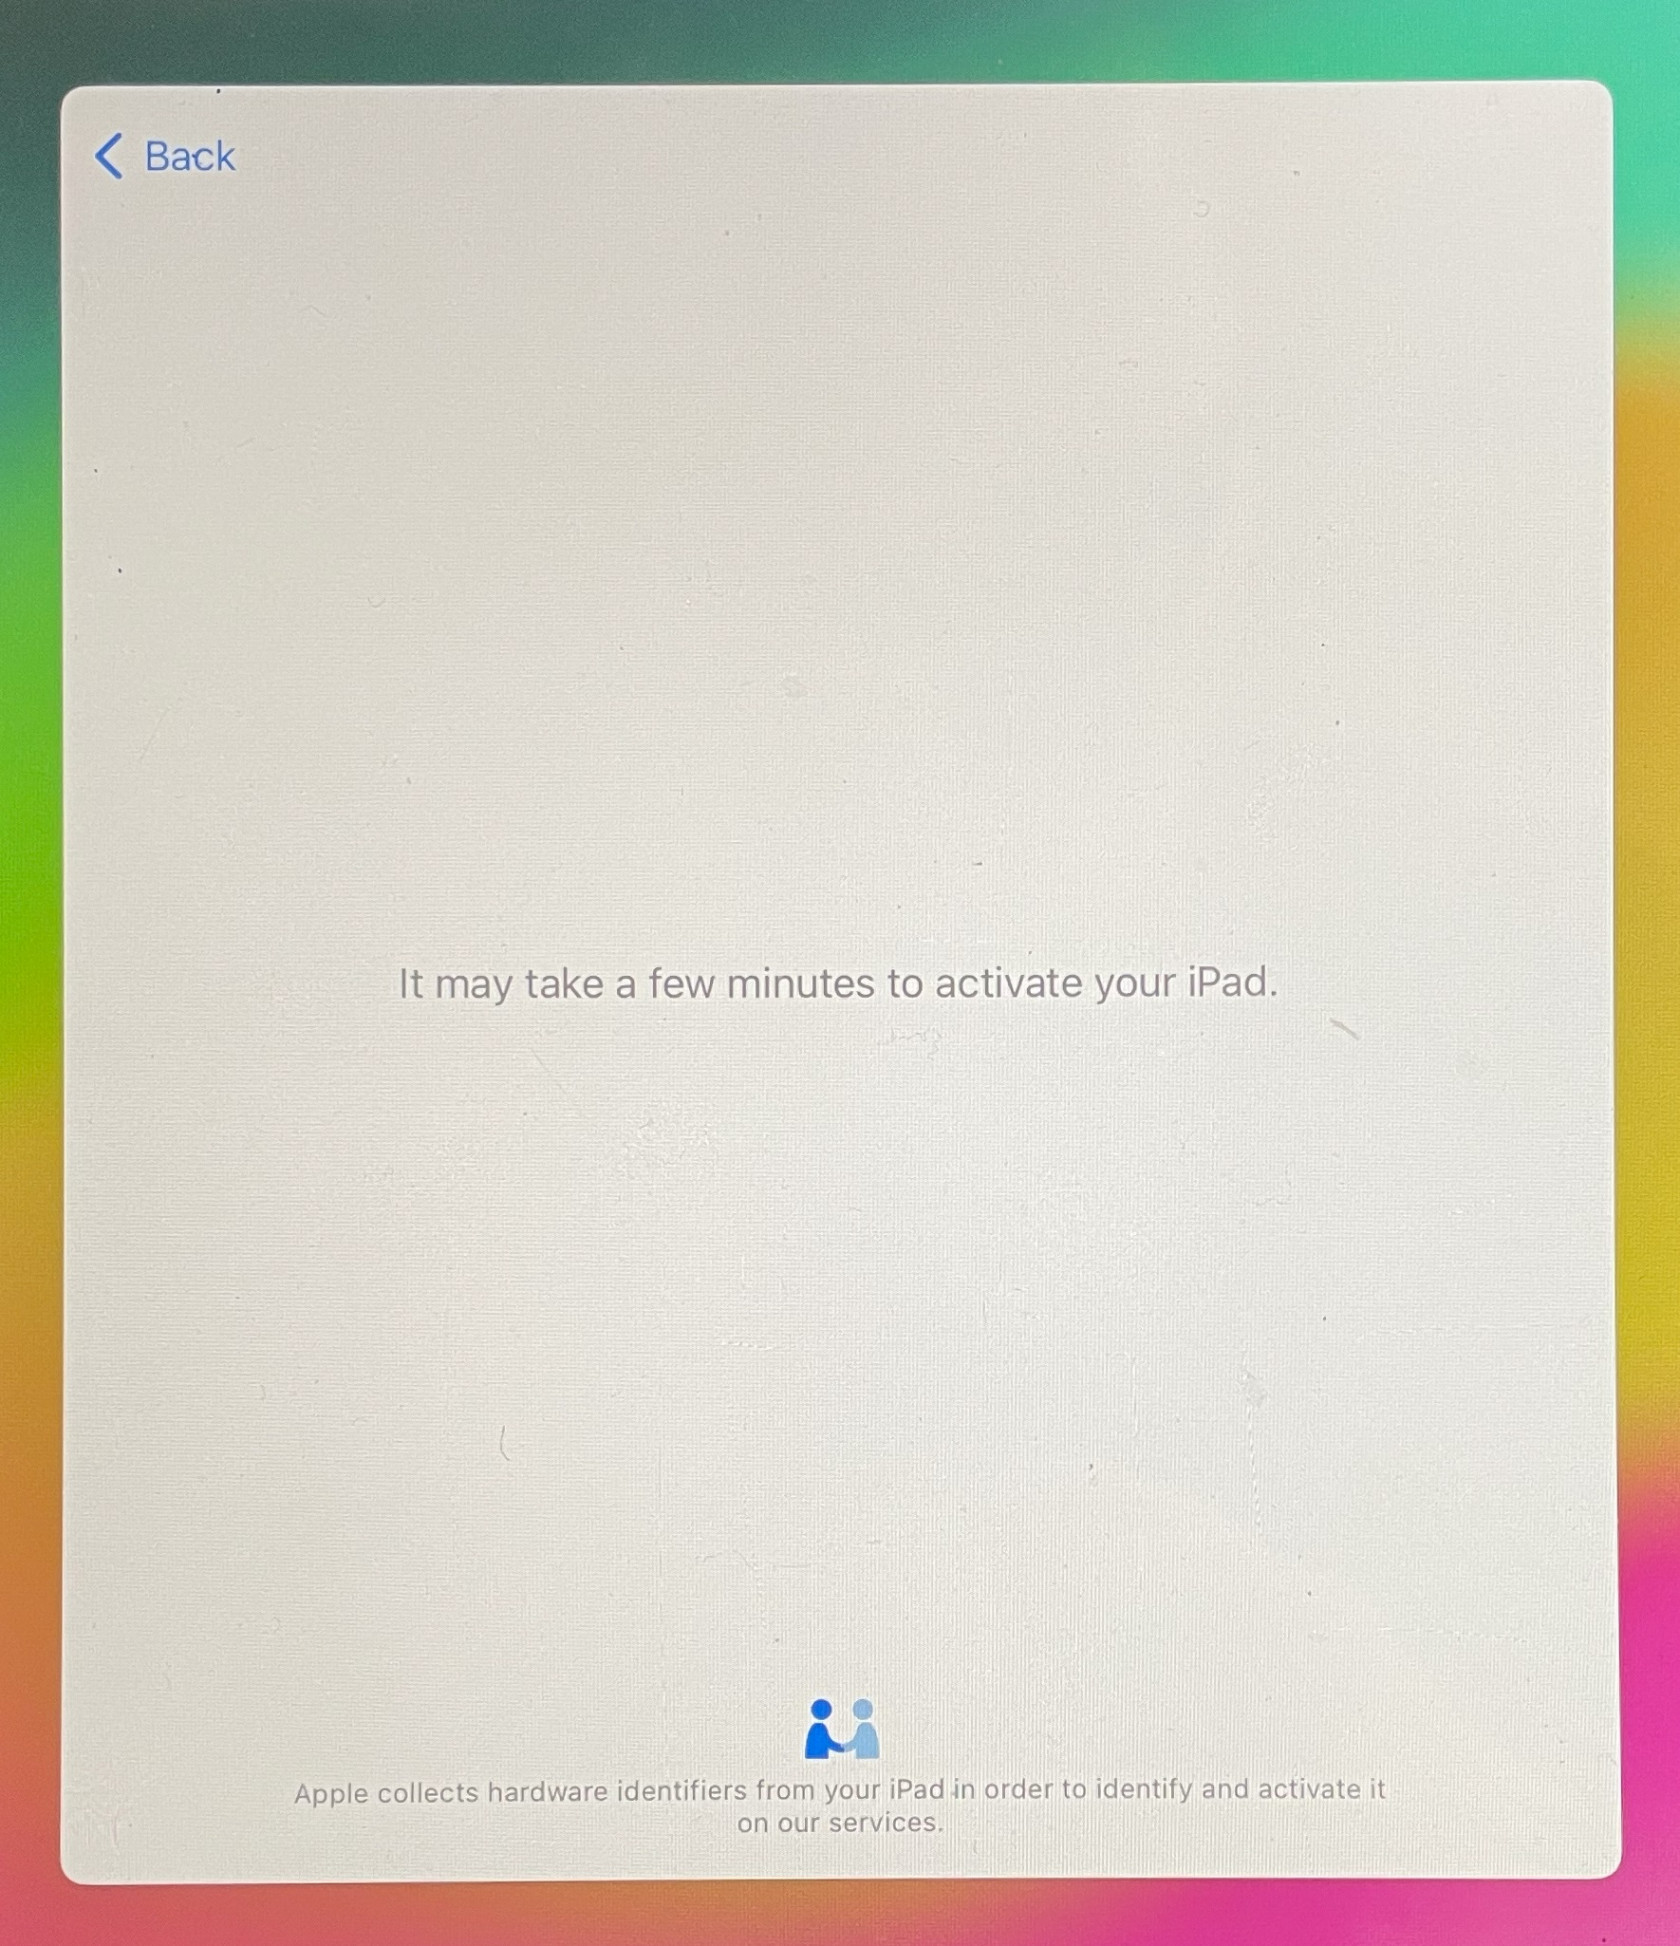
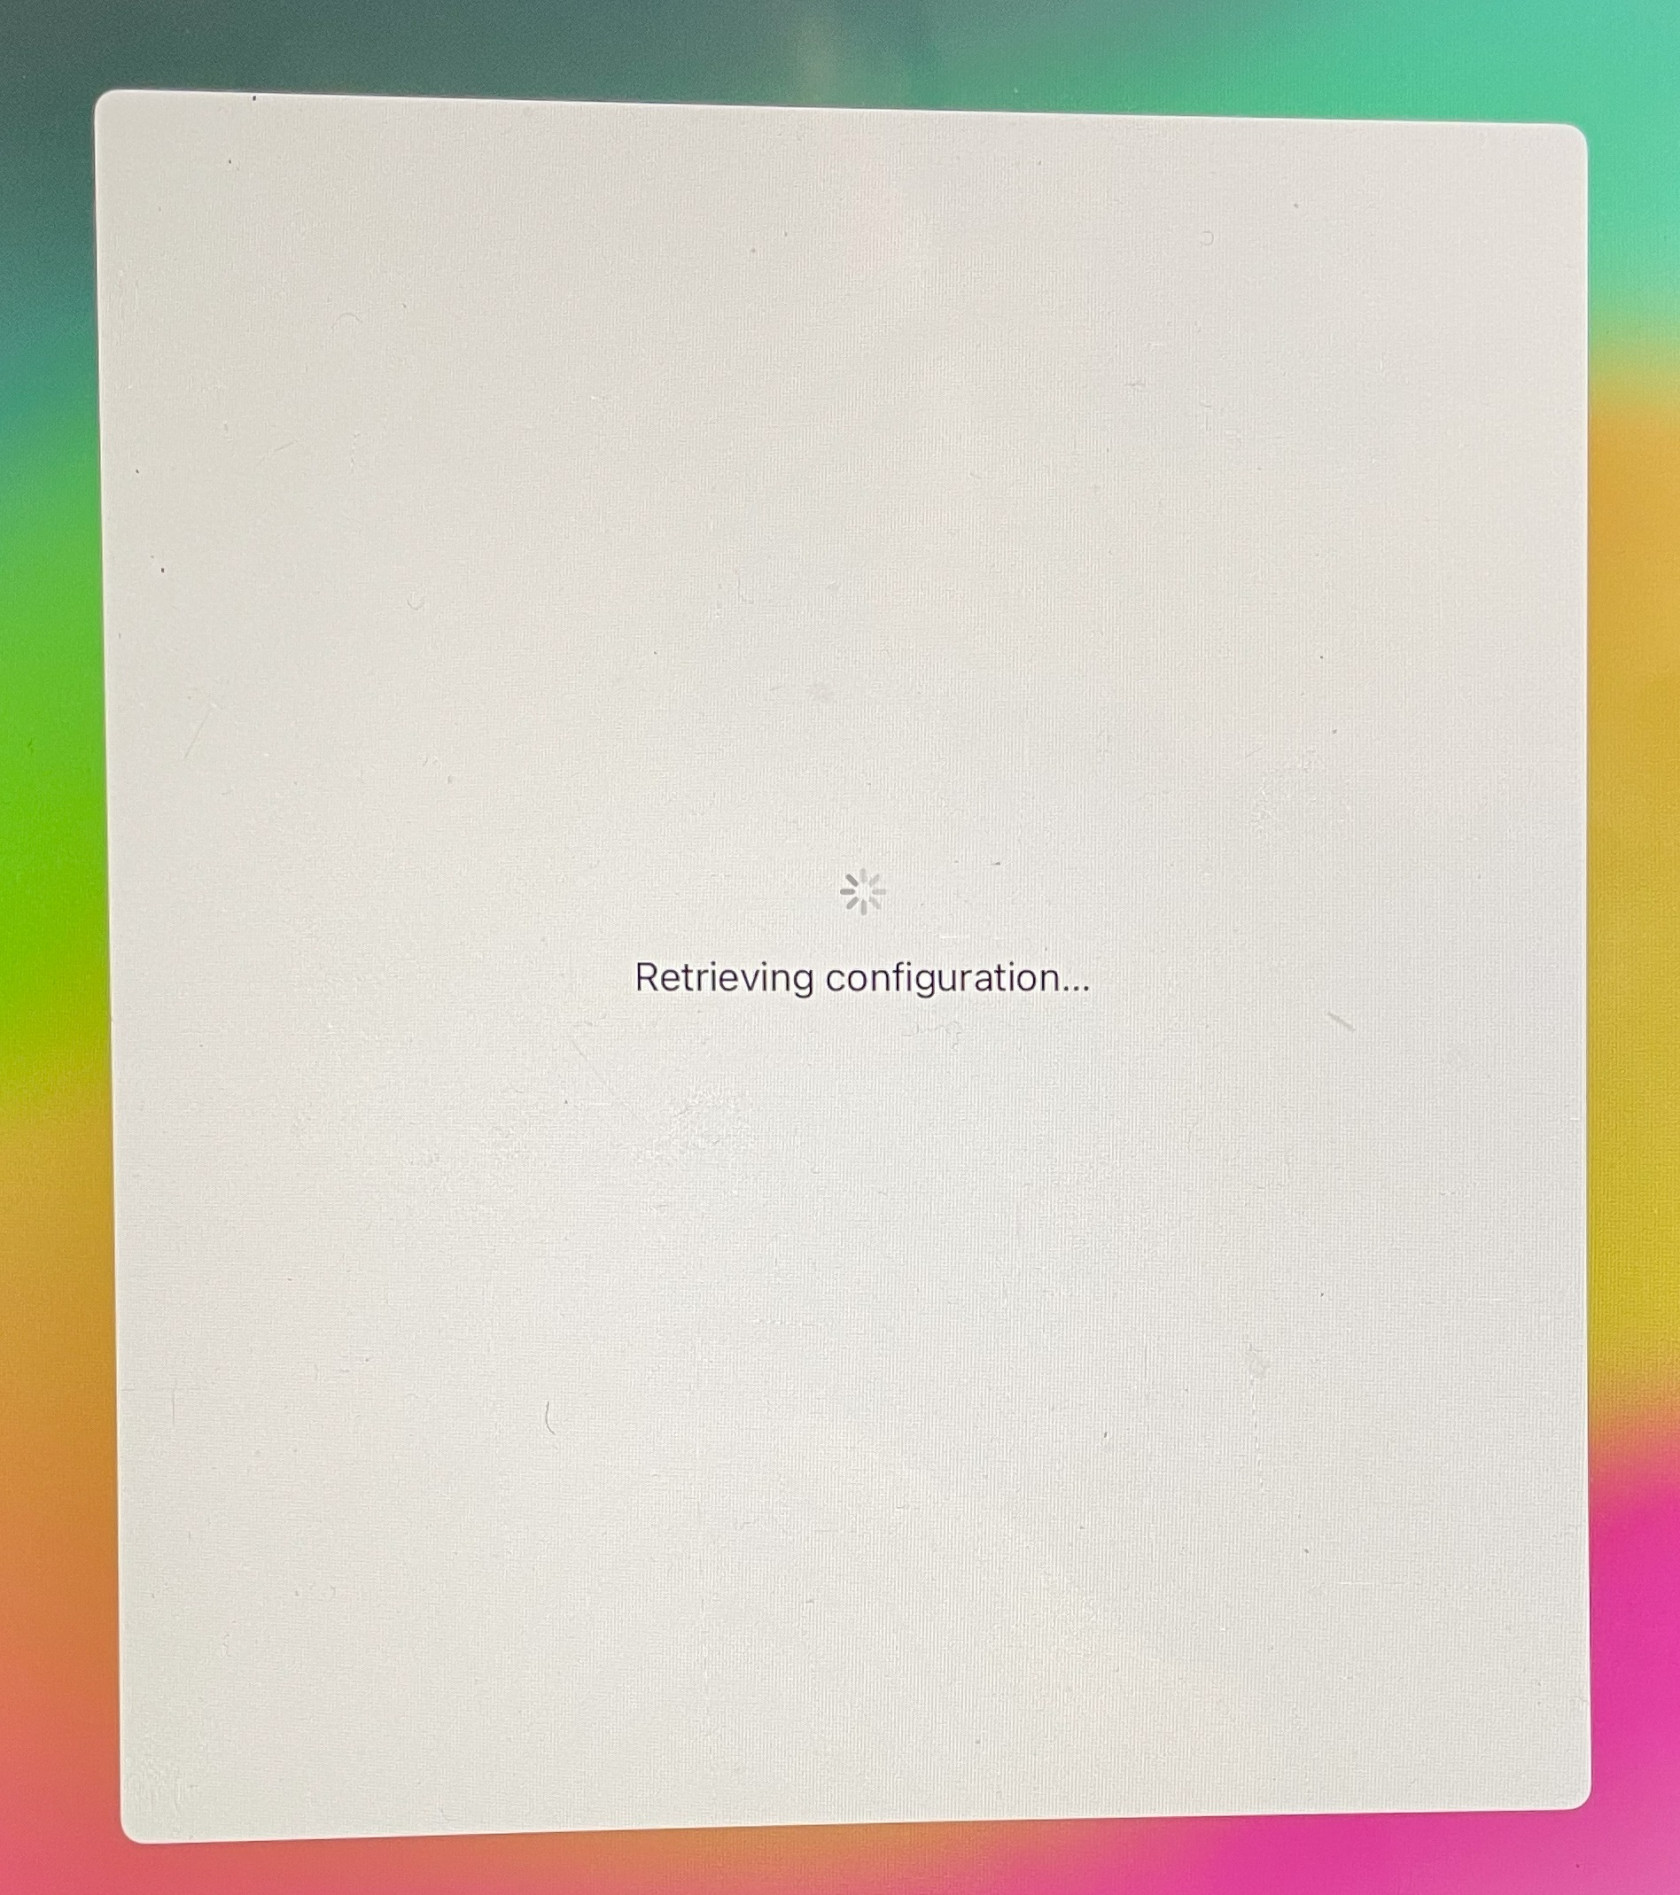
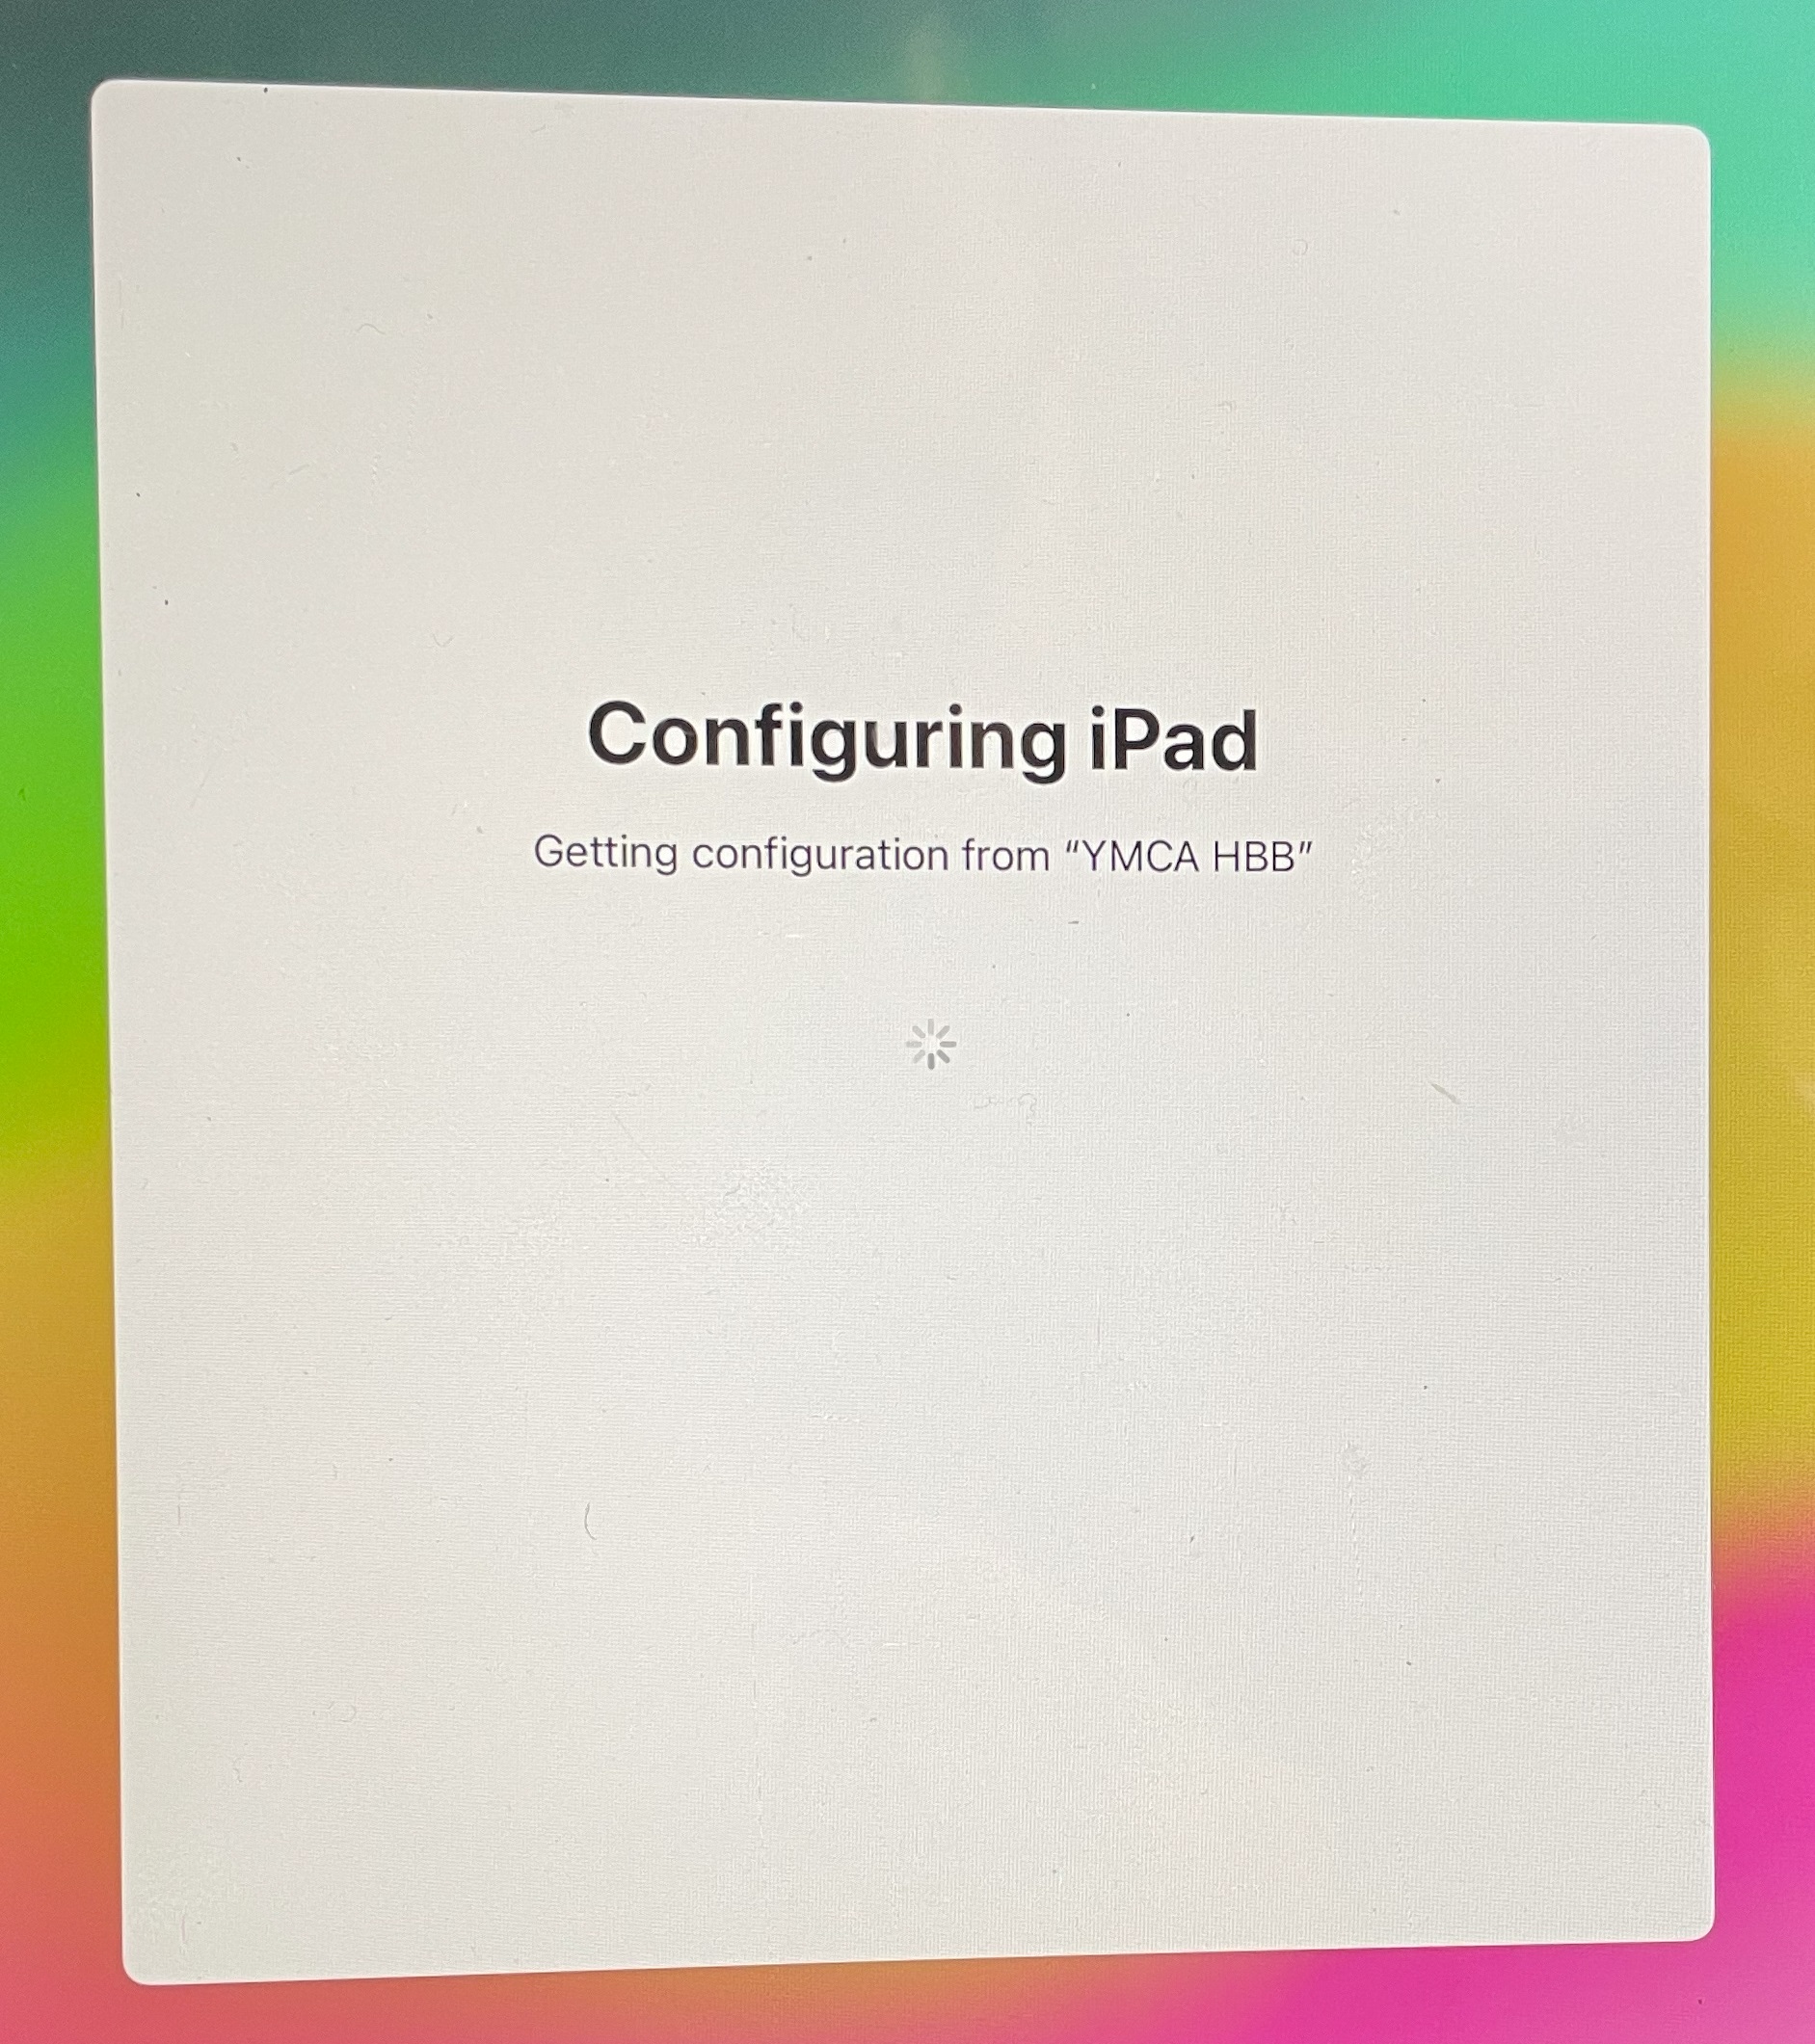
Once the iPad is connected to a network you will see it start its configuration process.
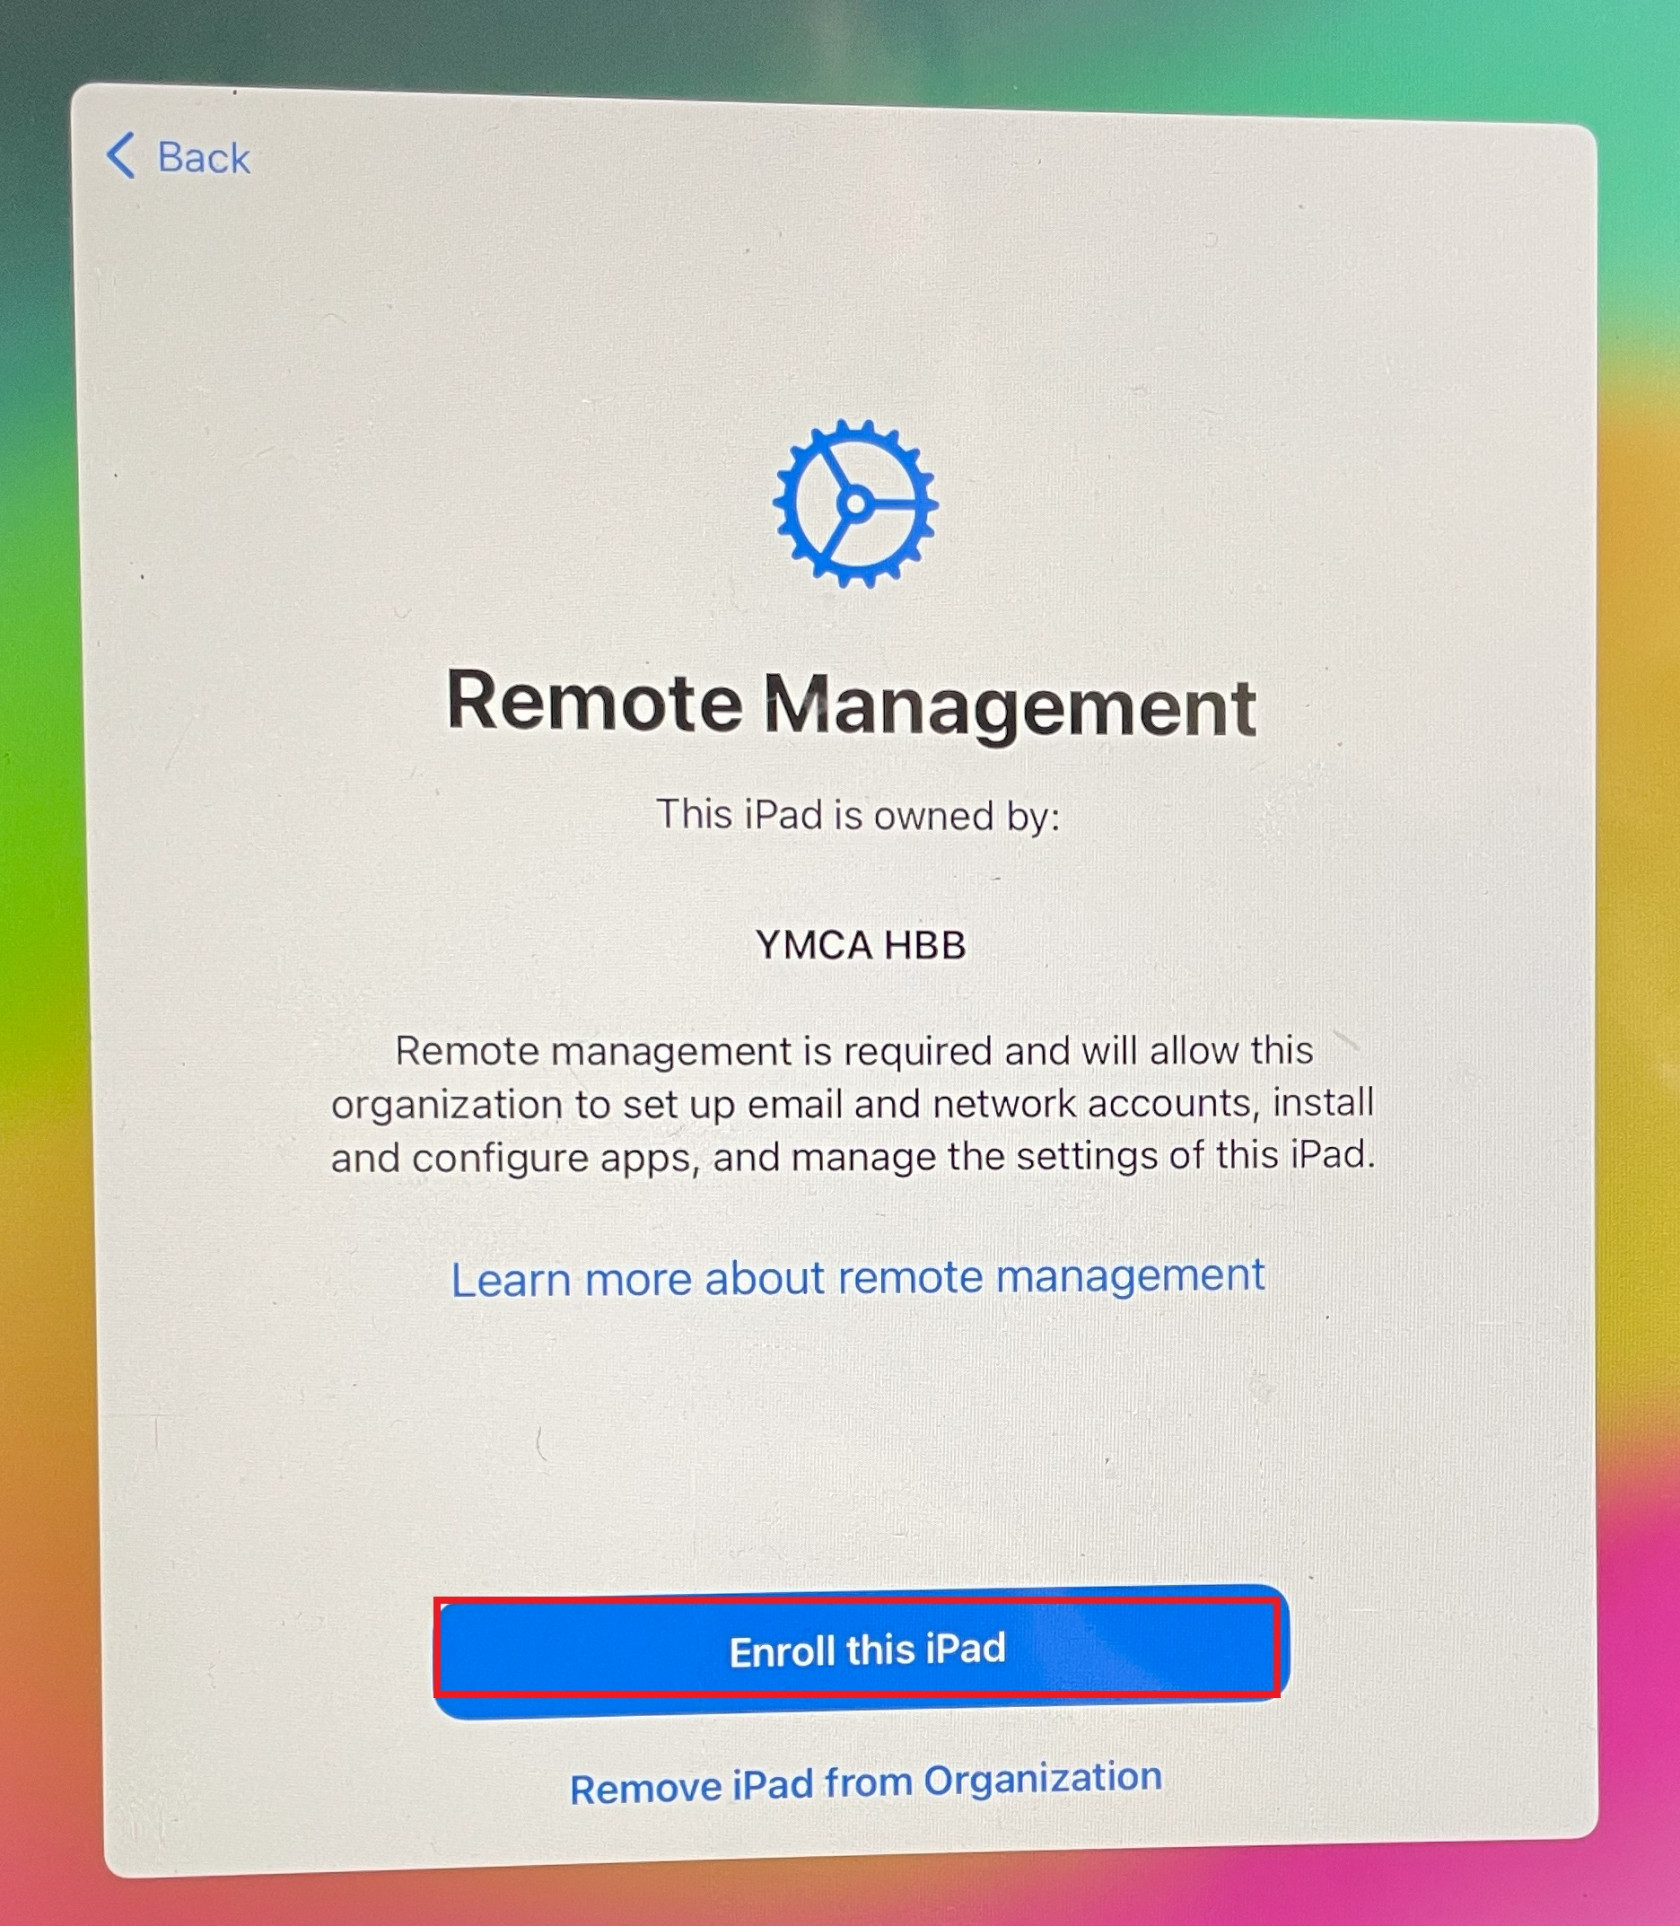
Step 14 - Click Enroll this iPad
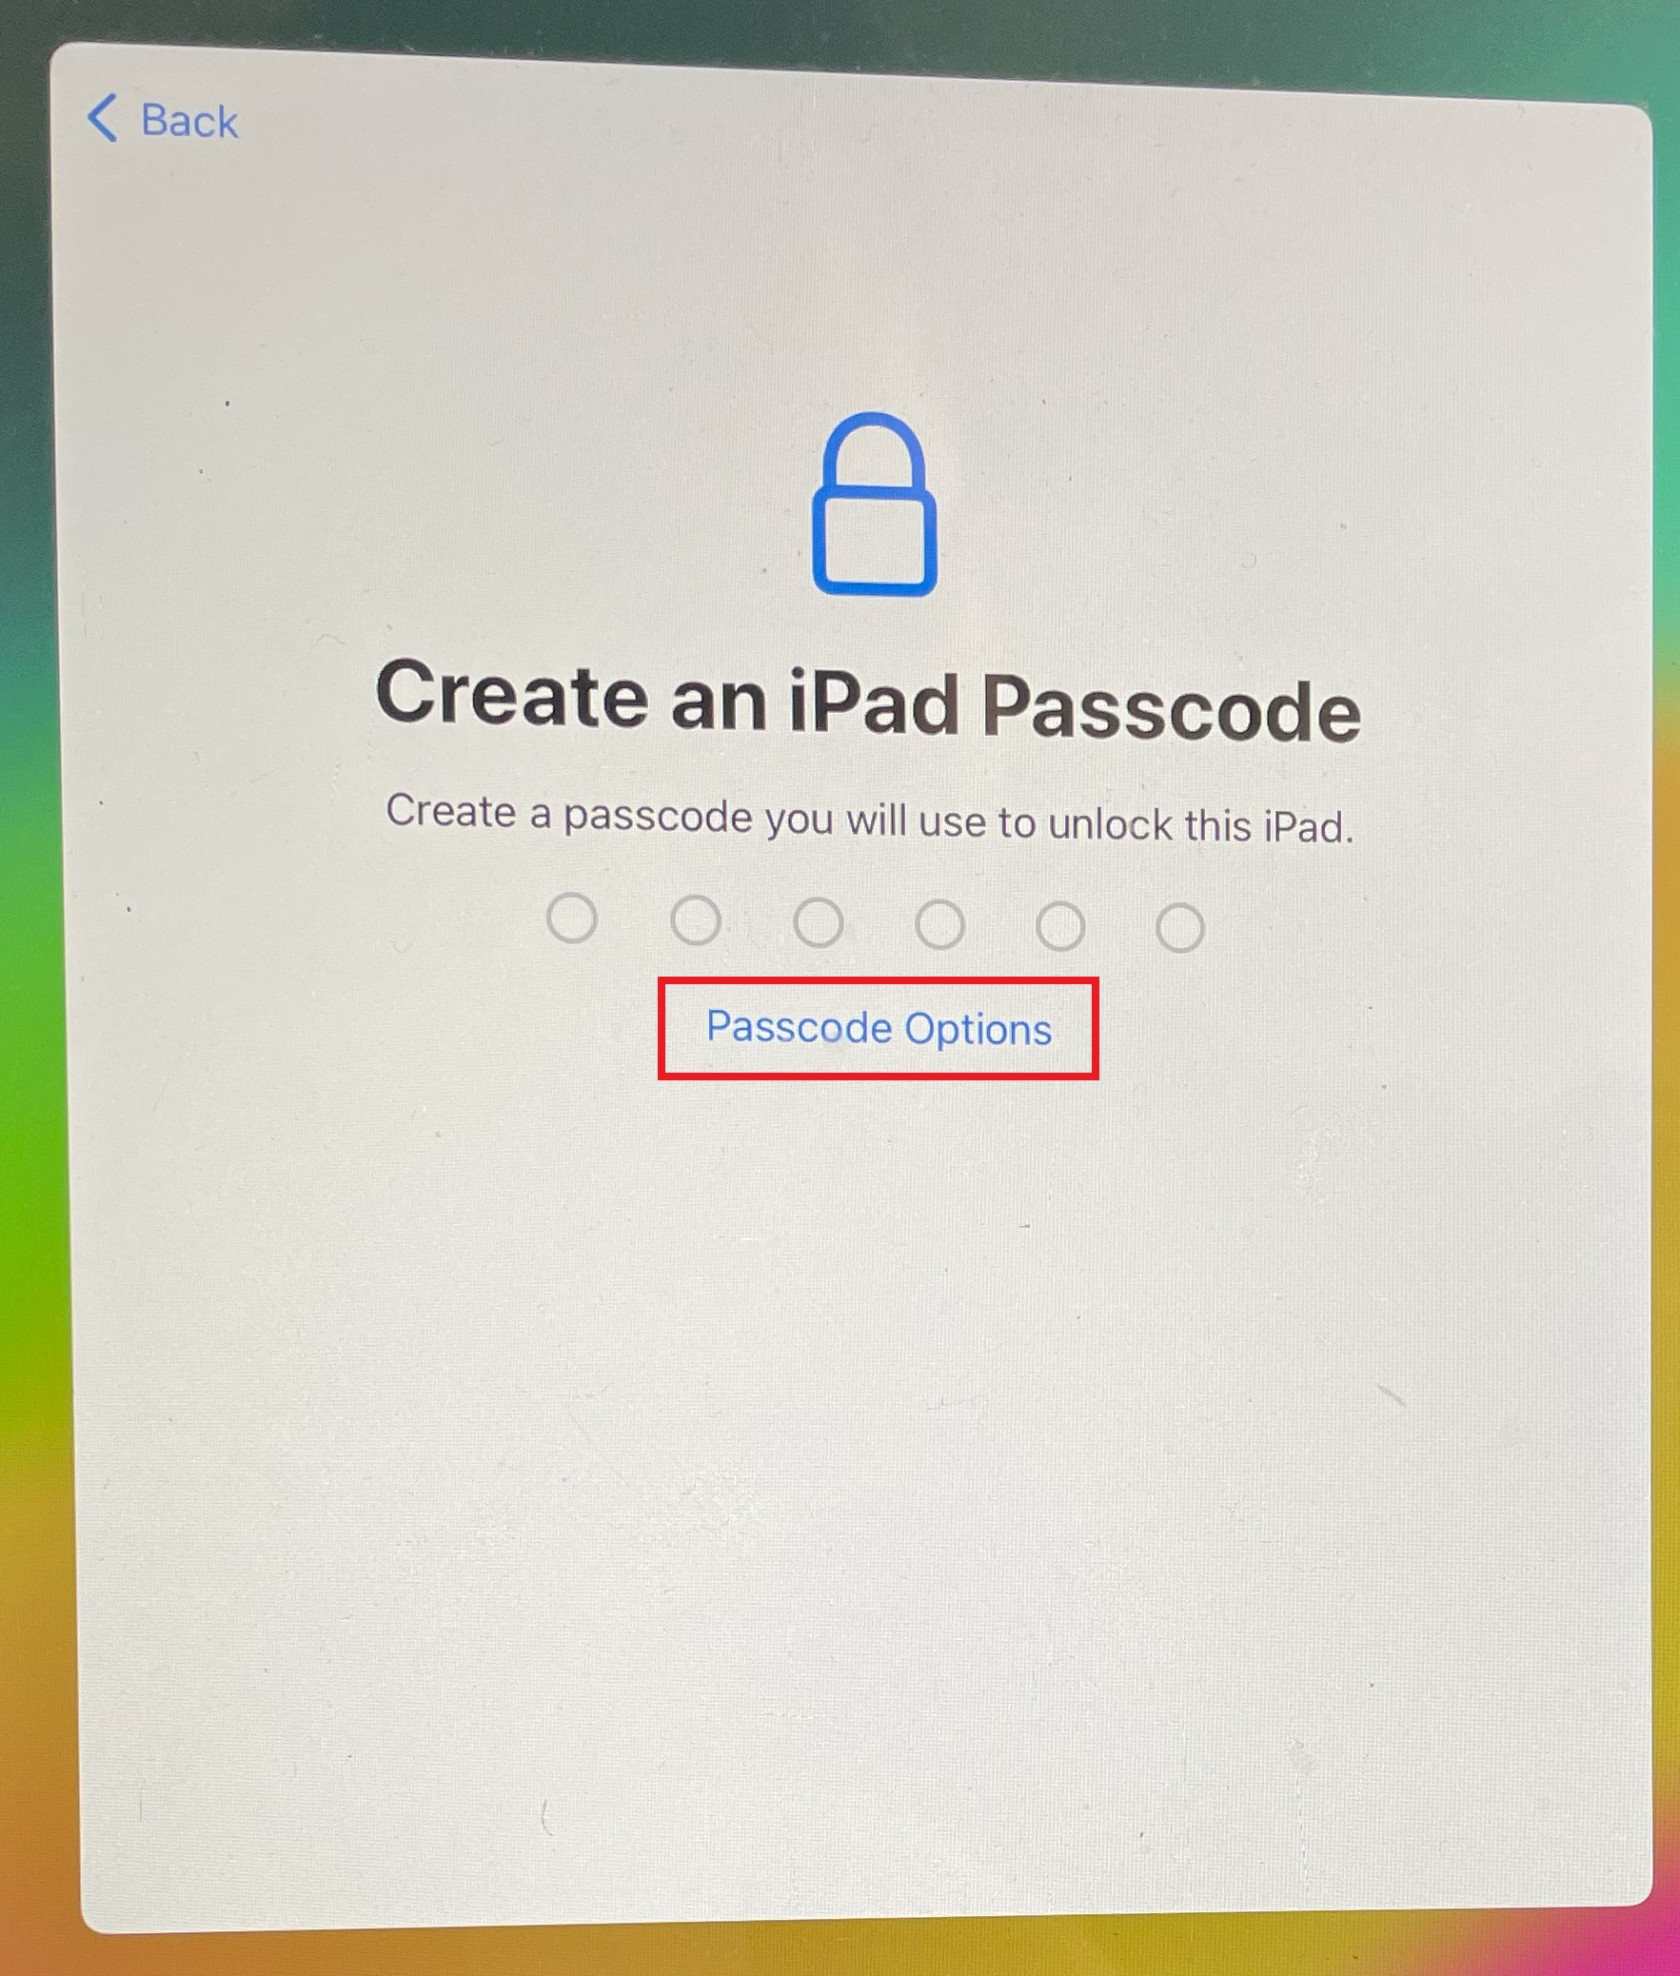
Step 15 - Setup the Passcode - First we will need to change the option from a 6-digit passcode to a 4-digit passcode.
Click Passcode Options
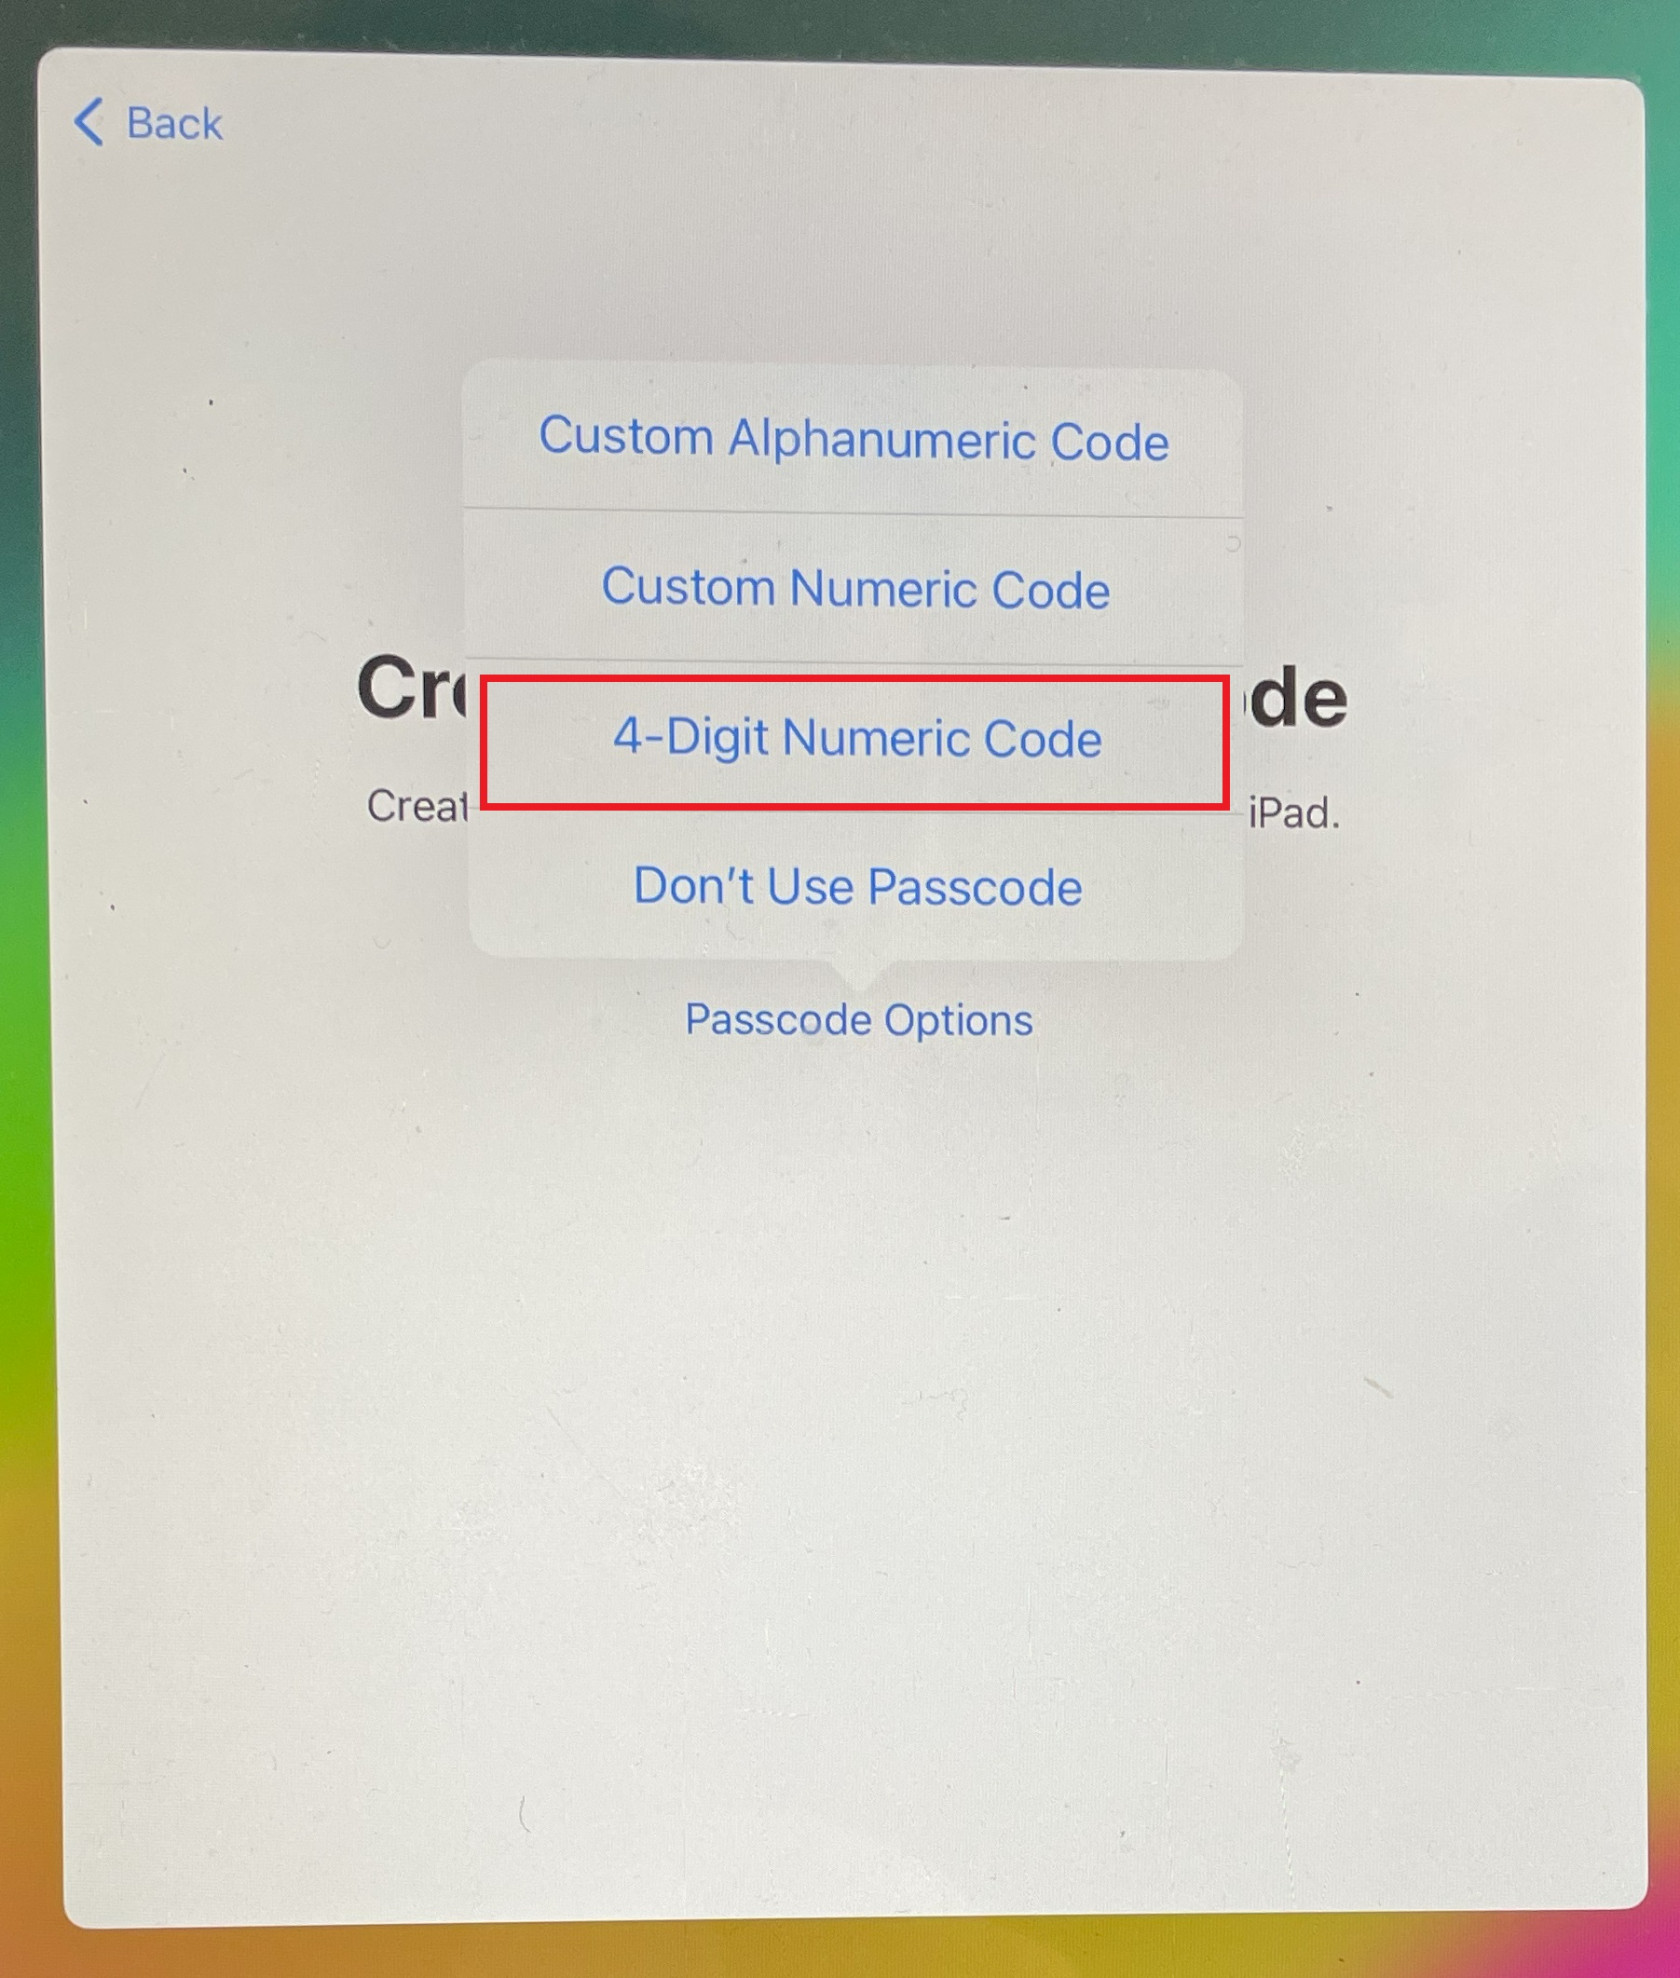
Click 4-Digit Numeric Code
Enter the Passcode you want to use - YMCA Standard is 9622
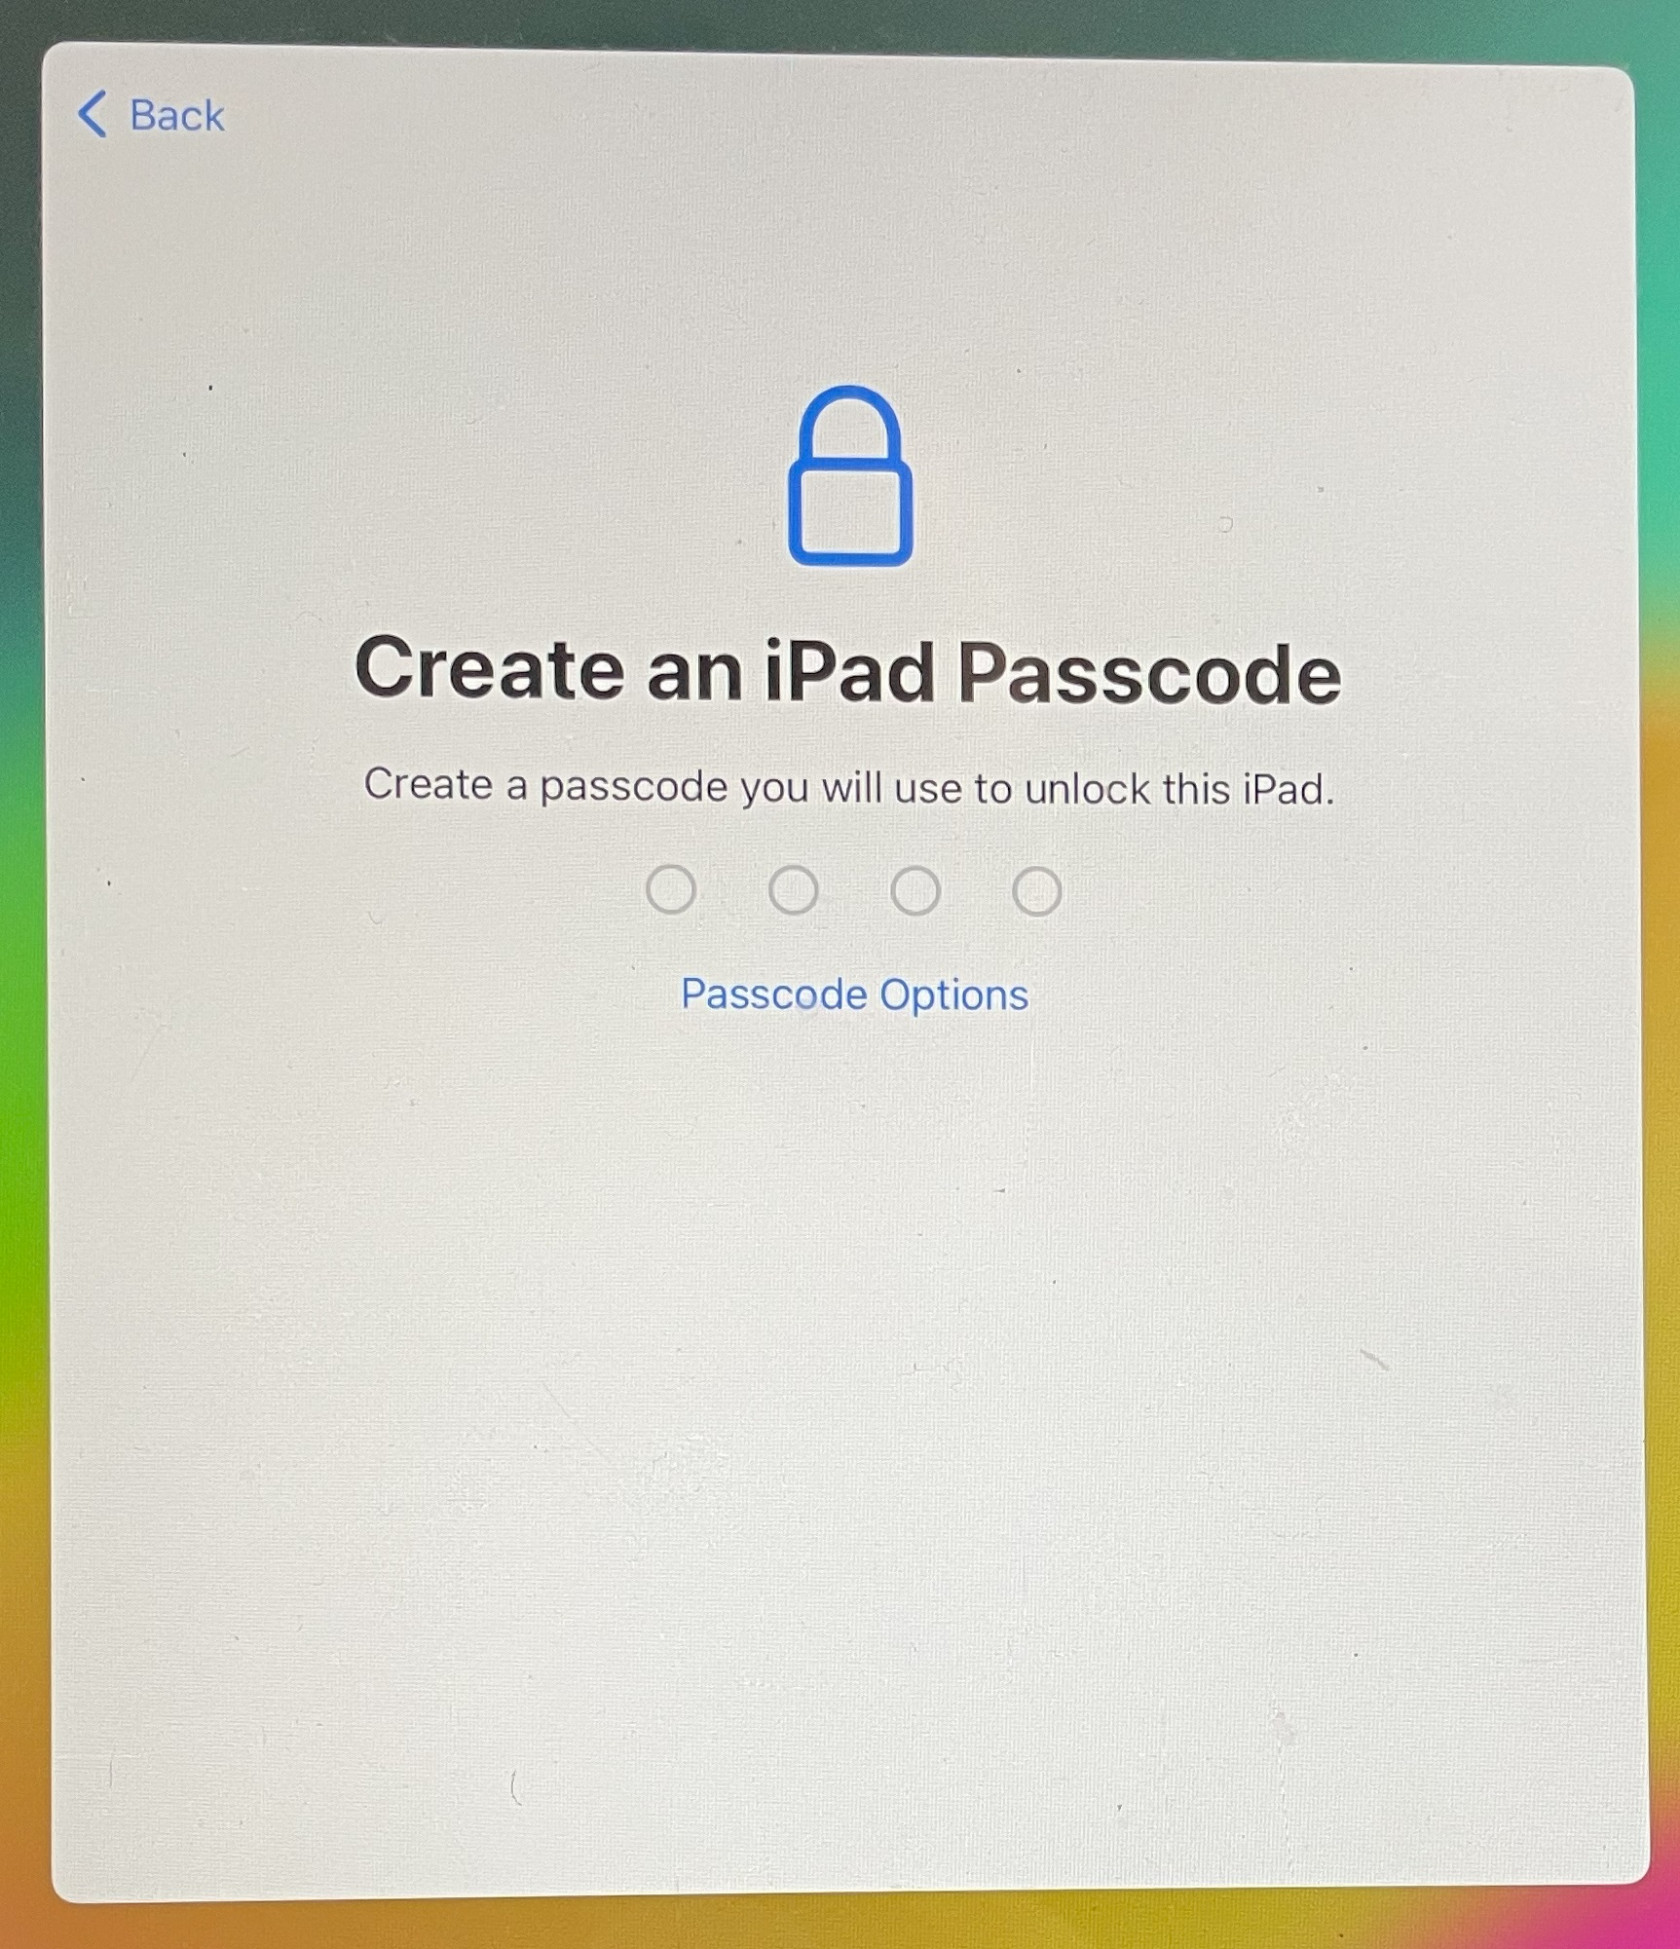
Re-enter the new Passcode
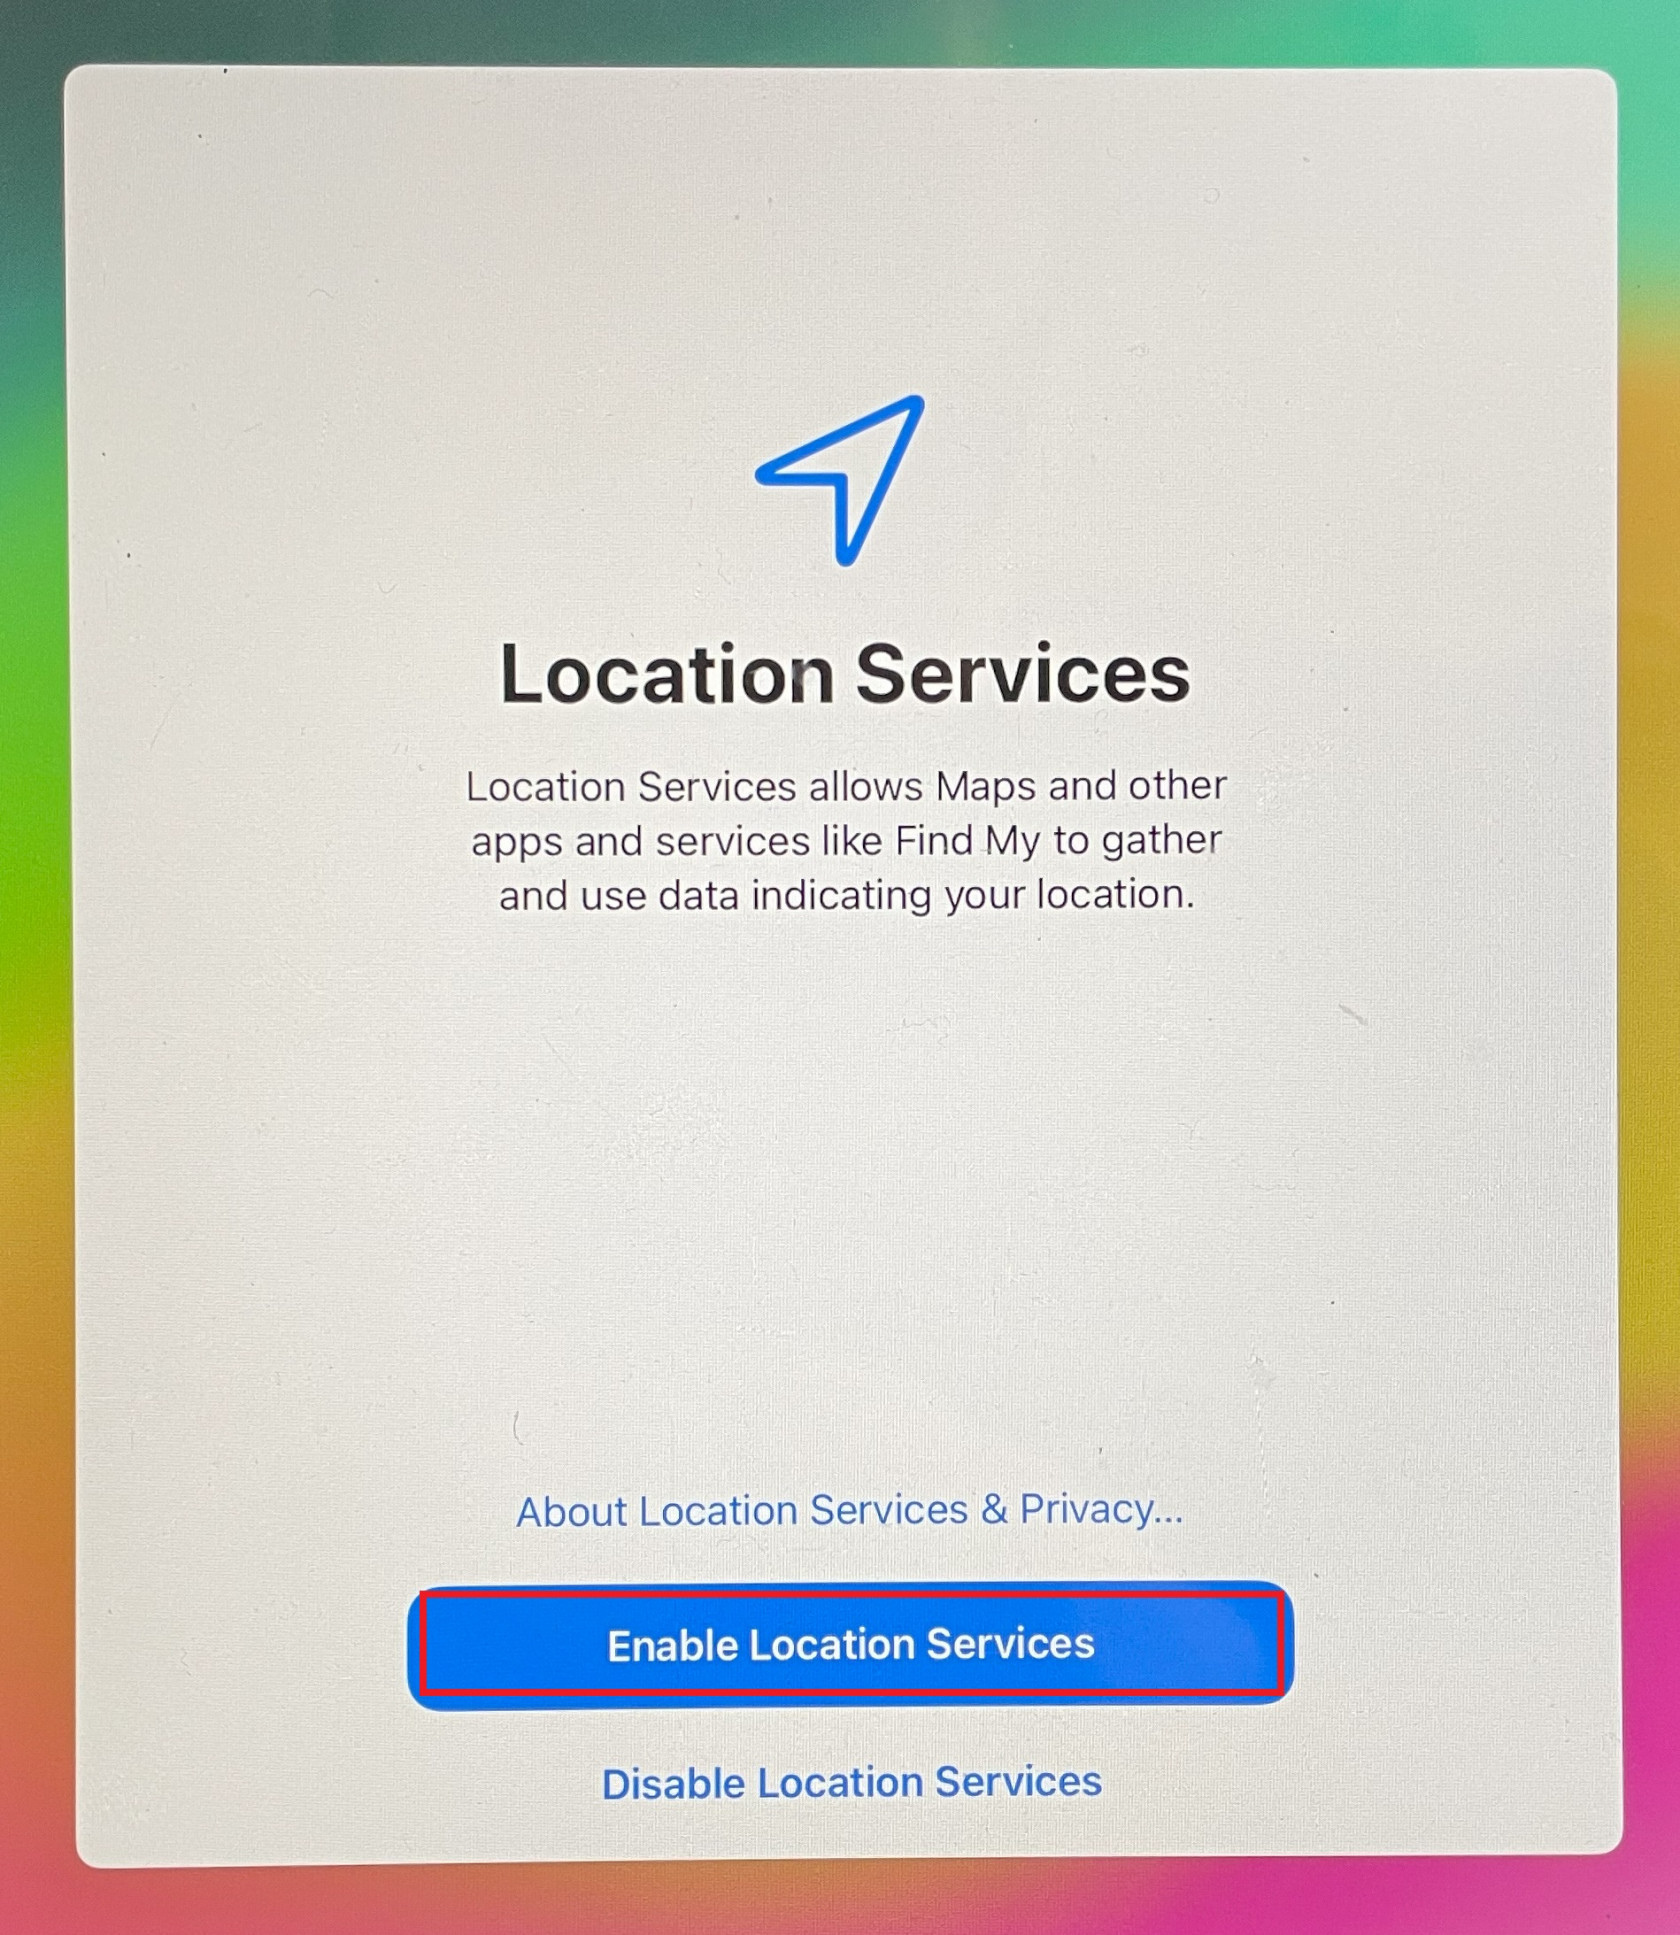
Step 16 - Click Enable Location Services
All done! Once the setup has completed the iPad will load into the standard home screen, within a couple of minutes you should see the iPads background change to the standard YMCA one with the home location and serial number listed, this will also start the process of installing the designated apps.
If the location that was auto selected is incorrect, please send a ticket to HBB Support and we can update the location remotely.