
How to Add an Email Signature
Microsoft Official resource:
Create and add an email signature in Outlook.com or Outlook on the web - Microsoft Support
Note: There are usually a few different ways to do the same task in Office 365, this guide is to provide the steps as simple and easy to understand as possible, they may not be the fastest.
Outlook 365 Outlook Email Signature:
Step 1 - Open Outlook in a browser.
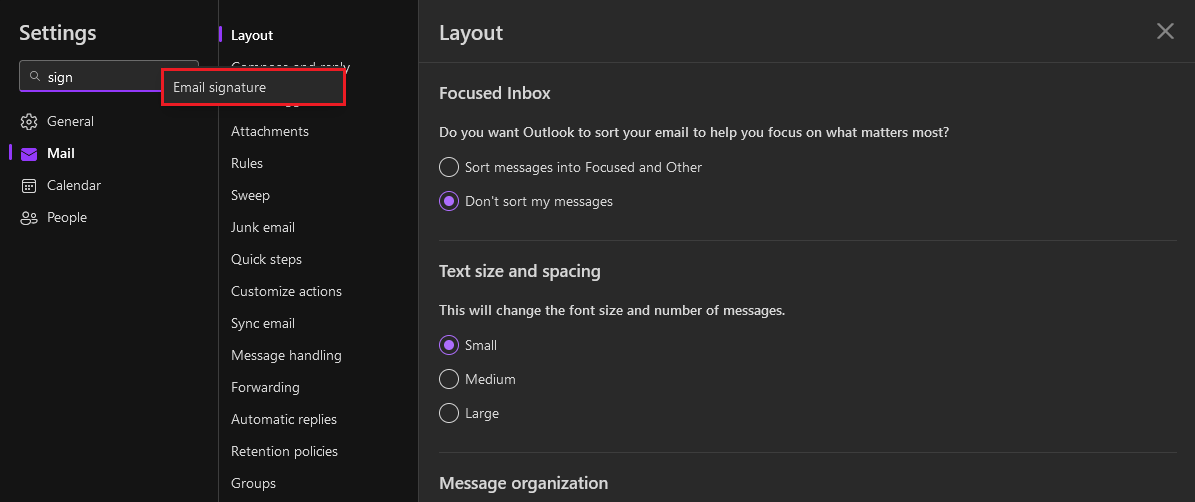
Step 2 - Click on the Gear icon  displayed in the top right of the screen.
Step 3 - In the Search box start typing "Signature" and Click Email Signature when displayed.
Step 4 - In the following window, Enter a Name for your signature and then customize your personal email signature, weblinks and banners are allowed as well.
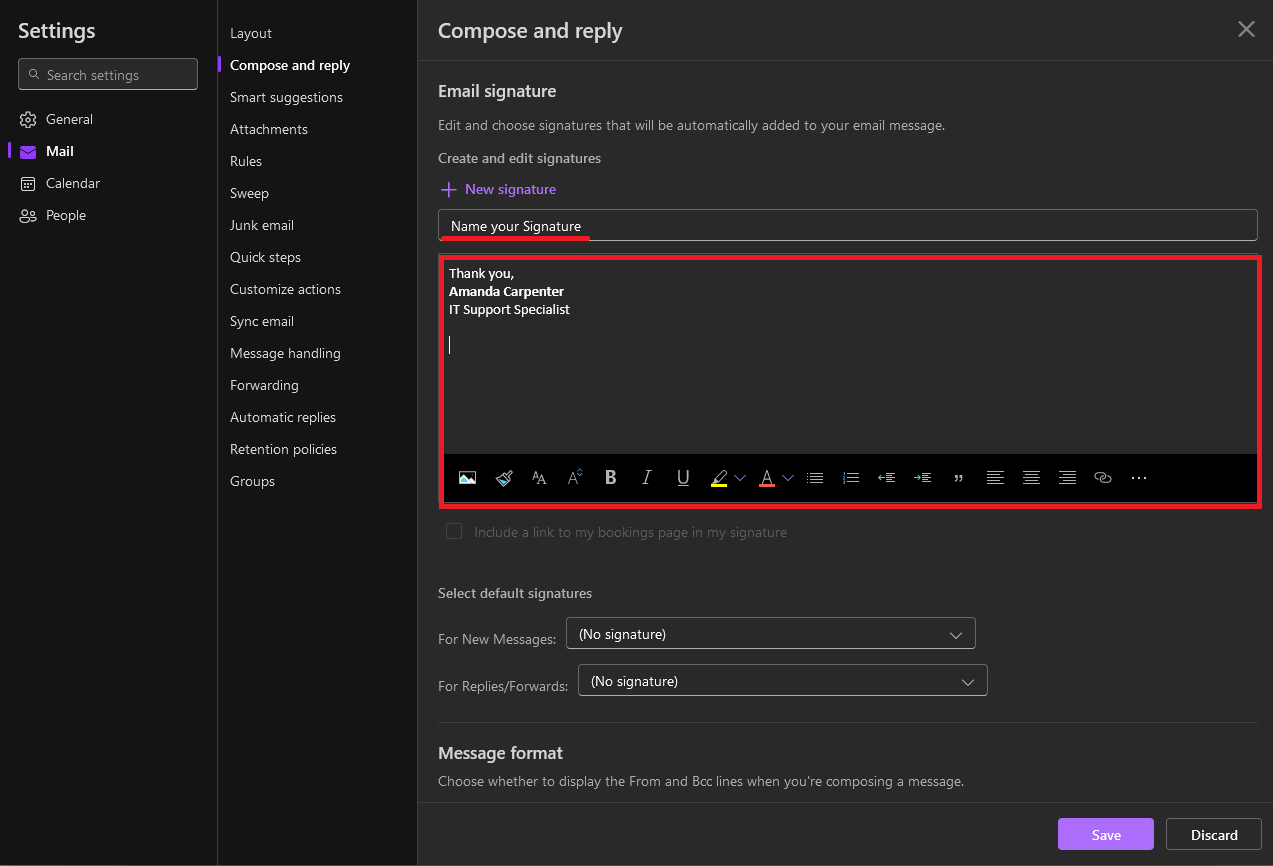
Step 5 - Click Save
Step 6 - Under Select default signatures, open the drop-down menu and choose the signature you want For New Messages, as well as For Replies/Forwards - if any. If you do not want a signature default on, choose (No signature).

Step 7 - Click Save