
How to Add Automatic Replies (out of office)
Microsoft Official resource:
Send automatic out of office replies from Outlook.com or Outlook on the web - Microsoft Support
Note: There are usually a few different ways to do the same task in Office 365, this guide is to provide the steps as simple and easy to understand as possible, they may not be the fastest.
To Turn on Automatic Replies (out of office)
Step 1 - Login to your email on Outlook
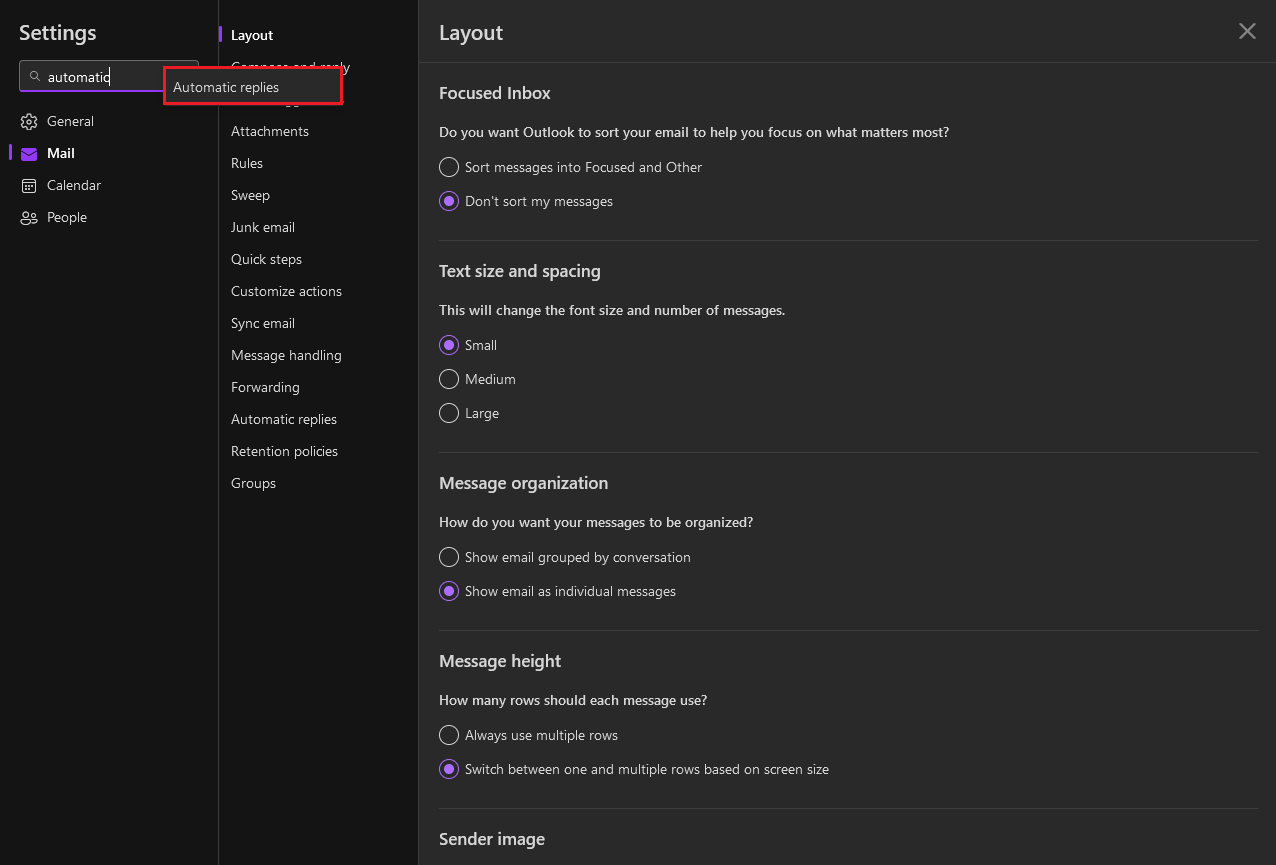
Step 2 - Click on the Gear  icon displayed in the top right of the screen.
Step 3 - In the Search box start typing "Automatic" and Click Automatic Replies when displayed.
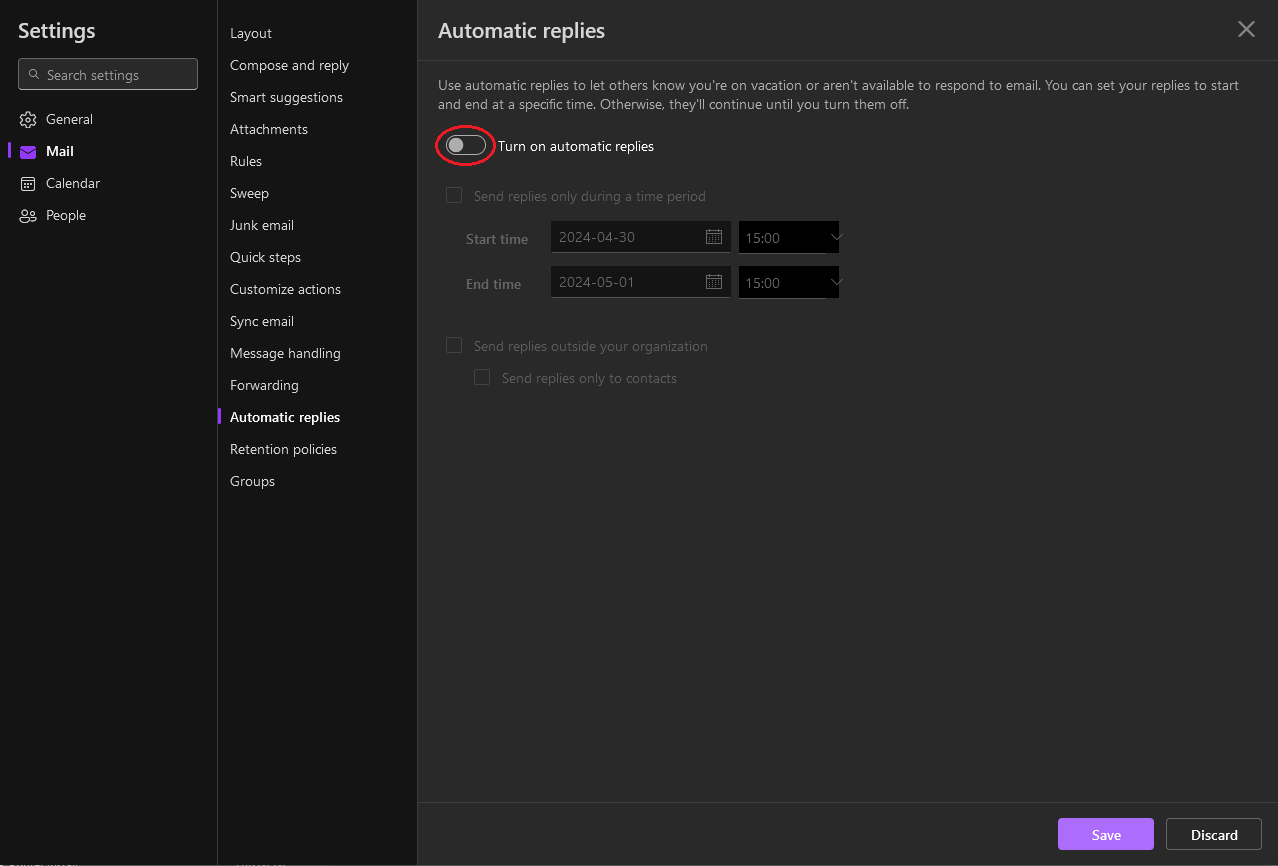
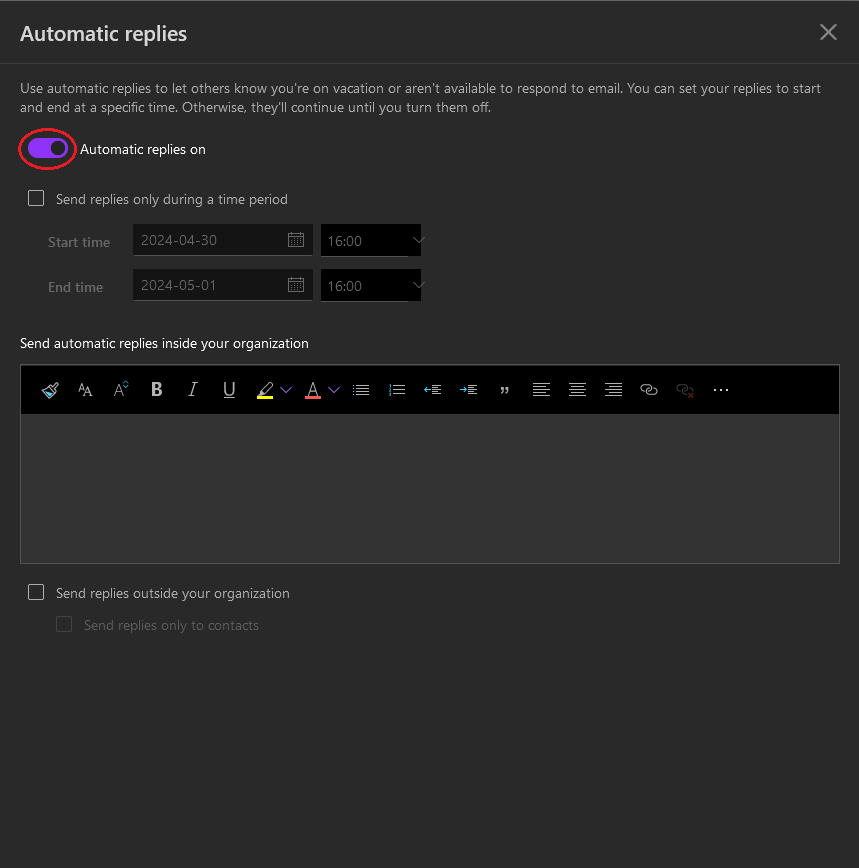
Step 4 - Click the Toggle to Turn on automatic replies.
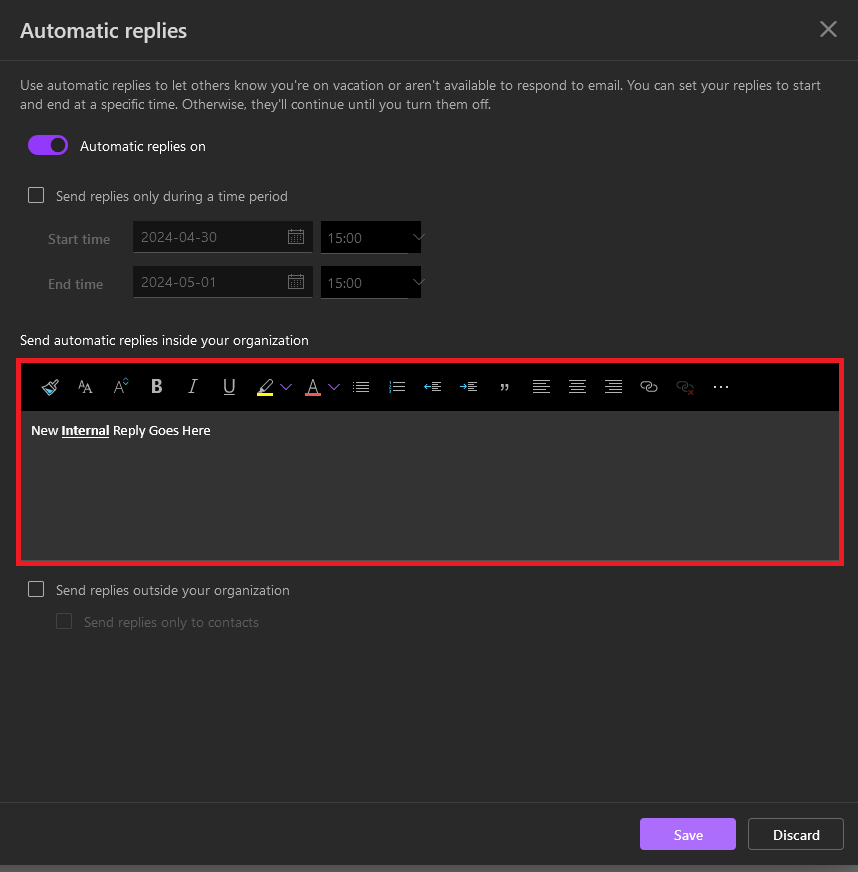
Step 5 - In the following box Enter the Reply you would like to send out.
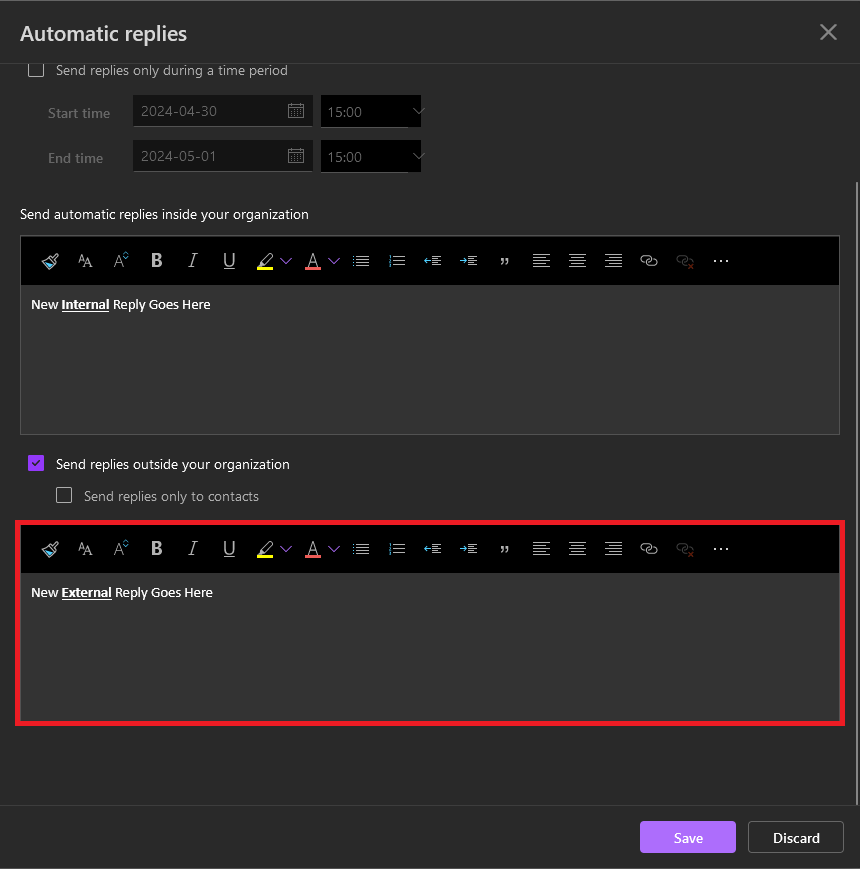
Step 6 - If you would like a reply sent to those outside the YMCA, Check the box for Send replies outside your organization and Enter the reply in the next box.
Step 7 - Click Save
Note: These replies will remain on and automatically sending until they are turned off. If you would prefer to have these sent out during a certain period you can Check the box for, Send replies only during a time period, and then enter your preferred Start Time and End Time. Using the time period also opens options pertaining to your calendar.
To Turn Off Automatic Replies (out of office)
Step 1 - Login to your email on Outlook
Step 2 - Click on the Gear icon displayed in the top right of the screen.
Step 3 - In the Search box start typing "Automatic" and Click Automatic Replies when displayed.
Step 4 - Click the Toggle to Turn off automatic replies.
Step 5 - Click Save